Showing posts with label canning. Show all posts

Wednesday, August 17, 2011

Millions of Peaches

Gotta eat me a lot of peaches.


A 24 lb box of peaches appeared in my house last week. I don't know if you can conceptualize how many peaches that is. It's A LOT. Enough that I have eaten a peach a day since them, and still had some to make Peach Crisp for the girls last week, two loaves of Peach Bread for eating and freezing, to give away two bags to friends, throw three out due to mold, bring a bowl-full to work, and still have about 12 of them in my fridge.  It's insanity.


Oh the joys of EWa produce.  Only $10 for the box. 

Last night decided I wanted to store 5 in the fridge for eating and get rid of the rest.  They're on their way to being over ripe and need to be eaten or processed YESTERDAY.  The easiest way to save them for later is, of course, to freeze them.  But I already have a bag of frozen peaches, so the next best thing is..... ICE CREAM!!!


I picked the the five ripest in the bin and found a recipe I could butcher to my liking. It had to be super peachy, and it had to technically be a sorbet - no dairy allowed in this "creamy" concoction.  Here's what I came up with:

Peach Sorbet
Butchered by Robyn

5 ripe peaches
3/4 cup water
1/2 cup sugar
1 Tbsp lemon juice
2 Tbsp Frangelico (or other booze - but no kirsh, I HATE kirsh)

Remove pits from peaches and dice, do not remove skin.  Heath peaches and water over medium heat for 10 minutes, or until peaches are cooked.  Stir in sugar.  Use blender, food processor, or immersion blender to puree peaches.  Add lemon juice and booze.  Refrigerate until cool.  Process in ice cream maker following manufacturer's directions.  Try not to eat it all before freezing for 3 hours.


I ate mine over a brownie, fresh out of the oven.  The hot brownie melted the soft peach sorbet and made magic in my mouth.  I plan on repeating the experience tonight with fully hardened ice cream.  The tiny taste I had this morning was very telling - this sorbet has retained its creamy texture and is not grainy at all after a full 8 hours of freezing. Success!

Monday, November 1, 2010

Apple Butter

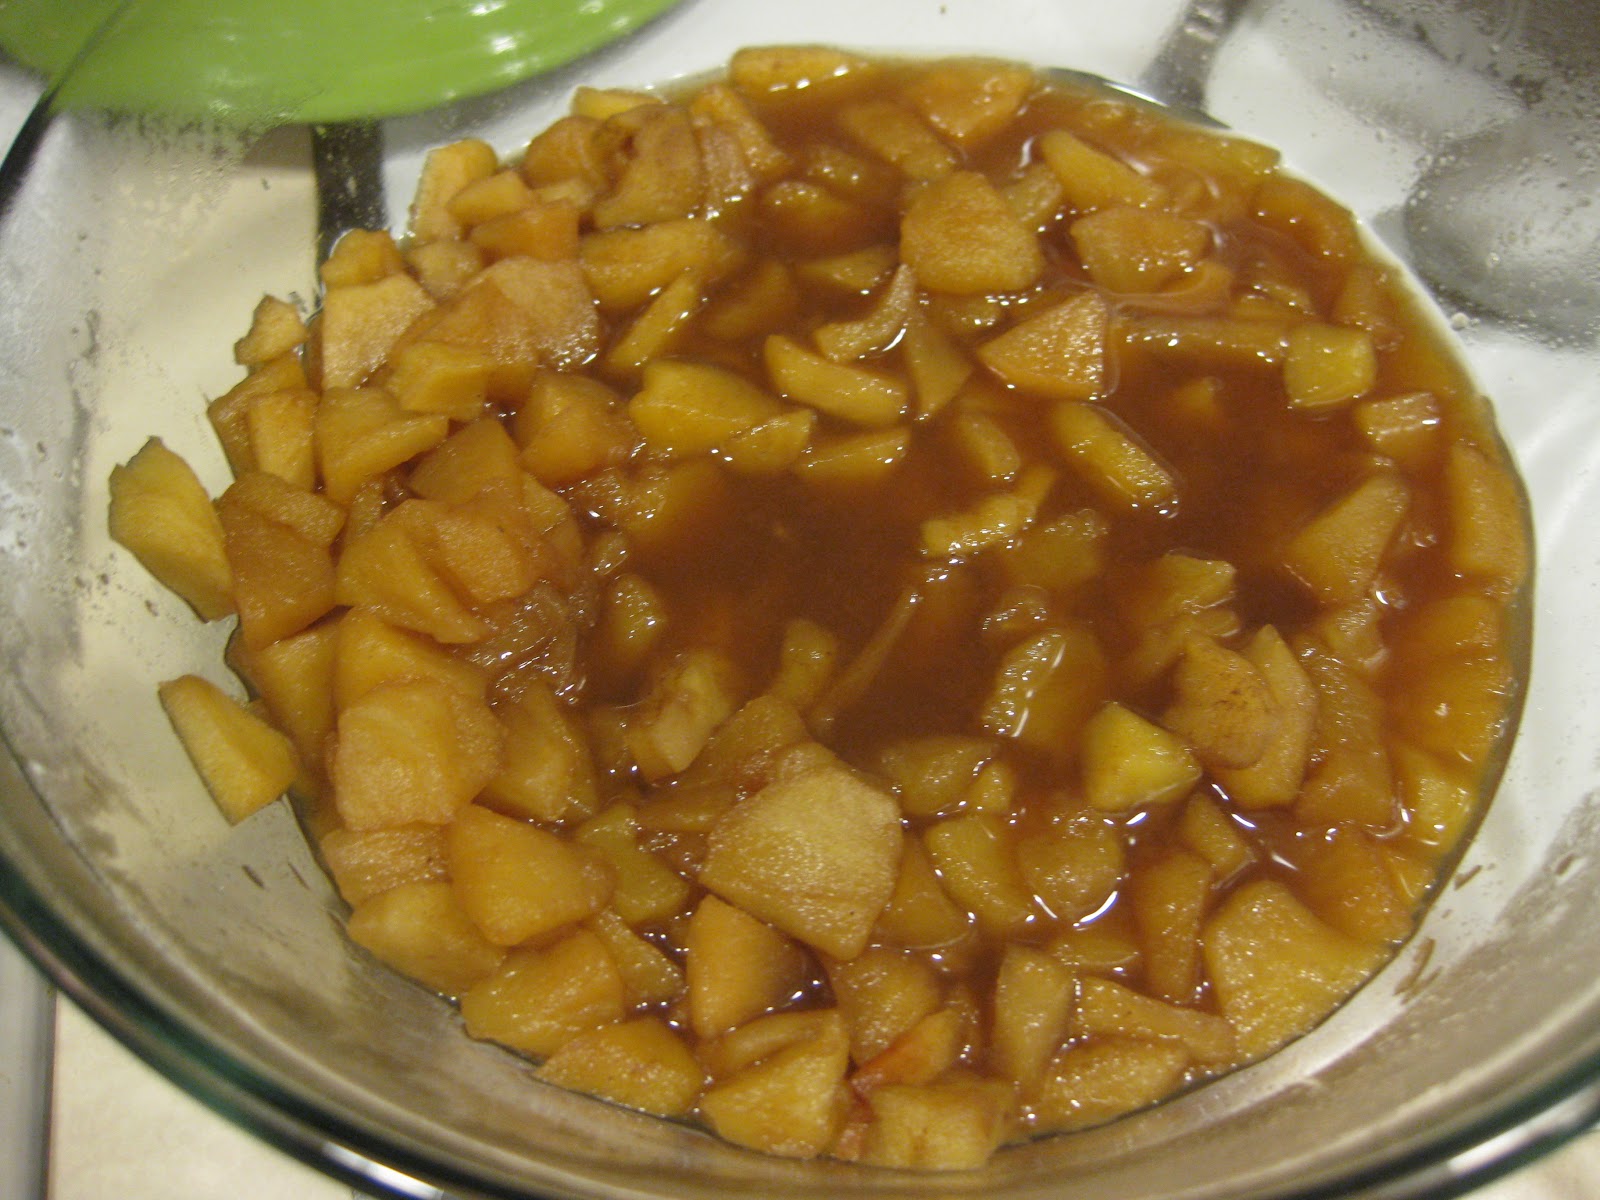
My first attempt at apple butter fell flat. I used a recipe from Tasty Kitchen that basically filled a crock pot with cored, sliced apples and a few spices, and cooked them for 8 hours on low before canning. I didn't quite have time for 8 hours plus canning time, so I cooked for 3 hours of high, then let them crock on low for 2 more hours. The apples got soft and smelled and tasted good, but they were pretty much still just chunks of apples, and not at all what I had in mind. So I ran it through my Cuisinart to mush it up, but still had wee chunks of apples. That's how I canned it, but it's.... kinda disappointing.


Then I found this recipe from Cooking Light. It got rave reviews. Basically the same idea, cook apples until they're tender, then can. But this one had an added step: press the soft, cooked apples through a fine-mesh sieve. The result is a pure, soft, amazingly delicious bite of heaven. The house was filled with an aroma that made me want to wear a sweater and read a book. Or just never leave the house. I wish I had a candle or room spray filled with this scent so I could inhale it all the time.


So if you do use the sieve (and I cannot recommend it more), what do you do with the cast offs? The recipe says "discard."  Discard from the recipe, yes. But from your life? Oh no no no no no. I put mine in the fridge and have been eating it since on ice cream, in my morning oatmeal, but the spoonful.... you get the idea. Even the cast offs taste awesome.

Without further ado, here it is, most amazing thing I've made since last week's caramel corn:

Overnight Apple Butter
From Cooking Light, Circa 2004

1 cup packed brown sugar
1/2 cup honey
1/4 cup apple cider (I used home pressed. Probably why it's so good.)
1 Tablespoon ground cinnamon
1/4 tsp ground cloves
1/8 tsp mace (I used more cloves because I didn't have mace)
10 medium apples, peel, cored, and cut into large chunks (about 2.5 lbs)

Option 1, Crock Pot (~10 hours):
Combine all ingredients in a 5-quart electric slow cooker.  Cover and cook on low 10 hours or until apples are very tender.  Place a large fine-mesh sieve over a bowl; spoon one-third of apple mixture into sieve.  Press mixture through sieve using the back of a spoon or ladle.  Discard pulp (to refrigerator!).  Repeat procedure with remaining apple mixture.  Return apple mixture to slow cooker.  Cook, uncovered, on high 1 1/2 hours or until mixture is thick, stirring occasionally. 


Option 2, Stove Top (~1 hour):
Combine all ingredients in a dutch oven.  Cover and cook over medium-low heat 1 hour or until apples are very tender, stirring occasionally.  Strain through a sieve and return to pan.  Cook, uncovered, over medium-low heat 15 minutes or until thick, stirring frequently.

Apple butter can be kept in the fridge for up to a week, frozen for up to 6 months, or canned and shelved for up to 18 months. But it won't last that long. Makes 4 cups.


I used my new dutch oven (see the picture? it's green and boooo-tiful) and the stove top method. If I wanted to eat all of the next day, I would start this in the crock pot and cook over night. But for canning, I was happy to use the quick 1 hour method. I came up with about 4 and a half cups using giant Golden Delicious from my parents' yard.


I found a great way to use up a jar of the chunky apple butter - baking! It may be unattractive to spread on toast, but in these bars you'll never notice. Mmmmm good.


Apple Butter Dessert Bars
Modified from Williams-Sonoma Pecan Pumpkin Butter Dessert Squares

1 box yellow cake mix, set aside 1 cup
1/2 cup butter, melted
3 large eggs
1 1/2 cups apple butter
2 Tbsp milk
1 Tbsp flour
1/4 cup sugar
1/4 cup butter, softened
1 tsp cinnamon

Preheat oven to 350 degrees.  Grease and flour a 9x13 pan.

Divide cake mix, placing all but one cup in a mixing bowl.  Stir melted butter and one egg into the cake mix until combined.  Press the mixture into the bottom of the pan and set aside.

In another bowl, mix apple butter with two eggs and milk until combined.  Spread apple mixture over pressed cake mix.

Stir the reserved 1 cup cake mix into the flour, sugar, and cinnamon.  Cut in soften butter until crumbly.  Sprinkle over the top of the apple layer.

Bake for about 35 minutes, or until golden brown (mine took almost 40 minutes).  Cool and cut into 2 inch squares.  Serves 24.

Friday, August 27, 2010

The Berry Merry Marma-Lady

I've been keeping my eye out for Alton Brown's Good Eats cookbook at all the bookstores I got to. It's $37 at the UBookstore, and I just don't want to spend that much. I was looking at Costco and they didn't have it, but oh the joy, look what they did have:

I snatched it up because golly, I just couldn't leave it all alone in the store....


Upon reading the first half about jams, jellies, preserves, and marmalades, I found one recipe that I couldn't pass up: Strawberry Lemon Marmalade. NOM NOM NOM NOM. How can you resist that? It's like my favorite summer drink, but condensed and on toast! Perfect.


Bought some strawberries when they were on sale about a week before I made the jam, I was that excited. Got my dear friend The Crist, to come over and help. She helped with the blackberry jam, too. Right off the bat, we ran into problems. I turned on the faucet to fill the canning pot and the water was an ugly murky brow. There is some serious road construction going on in my neighborhood and we decided they must have broke a pipe.


After yet another trip to the grocery store, my fourth of the day, and the same store I had JUST come out of before heading home, I had the water needed to fill the pot, with a little extra for drinking until they fixed my pipes.


We had some serious team work going on, with her processing the strawberries and me manhandling the lemons. I've gotten pretty good at zesting citrus fruits -- vegetable peelers work wonders. After that, we had some good luck and didn't have any problems.

Aside from a missing lid that jumped out of the hot water bath, and the recipe saying we needed less jars than we filled.


It's been sitting on the table for a couple days now and I can't wait to crack open a jar to try it. But with peach butter, bluebarb and blackberry jam all sitting there as well, I just can't do it. My fridge just isn't big enough for four jam jars! Much less one of lemon curd and one of orange marmalade.


Strawberry Lemon Marmalade
Ball Complete Book of Home Preserving

1/4 cup thinly sliced lemon peel
4 cups hulled and crushed strawberries (from about 2 quarts whole strawberries)
1 Tbsp lemon juice
1 package regular powdered fruit pectin
6 cups granulated sugar

Prepare canner, jars, and lids.

In a sauce pan, place the lemon peel and cover with water.  Bring to a boil over medium heat and boil for 5 minutes.  Drain teh lemon peel, discarding the water and reserving the peel.  Place crushed strawberries, lemon peel, and lemon juice in a large, non-reactive pan.  Stir in pectin until it is well dissolved.  Bring the strawberry mixture to a boil, stirring constantly.  Add the sugar all at once.  While stirring constantly, bring the mixture to a boil that can't be stirred down.  Continue stirring and boiling for 1 minutes.  Remove from heat.  Skim any foam off the top of the marmalde mixture.*

Carefully transfer the marmalade into the prepared jars, leaving 1/4 inch headspace.  Wipe the rims, add the lids, then screw into place.  Place the jars in the canner.

Bring the canner to a full boil, then process for 10 minutes.  Remove the canner from the heat, allow to set for 5 minutes, then open the lid and remove the jars.  Allow the jars to cool overnight.  Makes about 8 half-pint jars.**

*After all was said and done, the marmalade looks tasty and delicious, but all of the fruit floated to the top of the jars during processing.  I told this to my canning guru (Mom), and she told me most recipes say to remove from heat and continue stirring for about 5 minutes, or until it starts to firm and fruit no longer immediately floats to the top.  She's so smart.

**We made 8 half pint jars. And then three more. I'd say prep a total of 12 jars, just to be on the safe side.

Blackberry Bonanza!

As a Pacific Northwesterner, I am surrounded by an ever increasing mass of blackberry bushes each year. And each August, those prickly, pesky bushes become a thing of beauty. The berries turn a deep blackish purple and they call to be eaten.

Unfortunately, blackberry bushes like disturbed ground, which often comes with construction, which happens to usually occur near roads. This means that while you're surrounded by what should be delicious berries, you are instead surrounded by beautiful bushes that taste like exhaust and dirt. If you eat a berry off of a plant on the side of the road you end up with a mouth full of a taste that you never quite want to eat again.


Some of us Seattlites that love berries find blackberry bushes off the beaten track where they can harvest full flavored berries by the bucket. Once upon a time at a rental, I had a patch in my back yard that I cursed 11 months out of the year, but that one month, right before we moved out, I hate my weight in berries. Today, I've had an increasingly hard time finding berry patches close to me that are up to my high standards. Luckily, I often work "in the field" near hydroelectric projects. These places are ripe with disturbed ground and sometimes have acres full of berries behind gated fences to keep the masses out. Also, luckily for me, I usually have a key.


This year, I hit the motherload. I found a patch during my monthly trip south to the small town of Cougar that was not only off the road, but also on public land (you never know about private land - they might have sprayed the bushes or even just want to keep them all for themselves).  I finished my work and on the way back stopped to pick six cups of berries, conveniently enclosed by the plastic containers still in my car from camping.

 True to my recent obsession, I had to make jam out of it. Nothing quite compares to homemade blackberry jam. Except maybe Mom's raspberry jam. Or my orange marmalade.

Now, if only they could modify the blackberry bush to be non-invasive, we'd be golden.


Blackberry Jam
Adapted from Tasty Kitchen

5 cups fresh blackberries
1 box Pectin
1/2 tsp butter
7 cups sugar

Wash (11-12) jars and screw bands in hot soapy water; rinse with warm water, or in the dishwasher.  Pour boiling water over flat lids in a saucepan off the heat.  Let stand in hot water until ready to use.

Crush blackberries thoroughly, one layer at a time.  Stir pectin into fruit mixture in saucepan.  Ad butter to reduce foaming, if desired.  Bring mixture to full rolling boil (a boil that doesn't stop bubbling when stirred) on high heat, stirring constantly.  Stir in sugar.

Return to full rolling boil and boil exactly 1 minute, stirring constantly*.  Remove from heat.  Skim off any foam with metal spoon.  Lade immediately into prepared jars, filling to within 1/8 inch of tops.  Wipe jar rims and threads.  Cover with 2-piece lids and process in hot water canner for 10 minutes.  Remove from hot water and place jars on a cool dry surface.  After jars cool, check seals by pressing middle of lid with finger.  If lid springs back, lid is not sealed and reprocessing or refrigeration is necessary. 

*Comments on this recipe said the jam didn't quite set when boiled for only 1 minute.  Other comments recommended boiling for 4 minutes.  I boiled for about 3 minutes and it's perfect.

Thursday, August 26, 2010

Um... blue WHAT?

Rhubarb. I just don't quite understand it. I know we had it in the garden when I was little, but I don't remember eating it. Alton Brown tells me the leaves are poisonous and my parents tell me that if the stalk is bigger than a stalk of celery it is too woody to be good. But how the heck to you prepare it? Other than pies and jams, I have no clue.  I barely remember it at home, but at grandma's house there is still occasionally a jar of bluebarb jam on the table. I always knew rhubarb was in it (duh, the name), but I never really thought about it.


So, with the thought of learning how to cook rhubarb, and to add to my canning repertoire, I set out to make a batch of rhubarb.  There is a big patch in my neighbor's back yard, and, nice fellow that he is, he told me to harvest whatever I needed as it was late in the season and they were probably done for the year. I hit the yard with my knife and picked the three smallest stalks, which were about the size of celery. I was worried I might be too late in the season for them to be good, but Google helped me out again. After reading numerous random pages on rhubarb, I found that if you have larger stalks you can strip off the "ribs" on the outside with a knife and they will taste less woody. Success! Now for the blueberries.

Before we went camping last weekend (but that's another post), I did some research on seasons and had big plans to pick huckleberries for the jam. I had been on a hike last year that had a giant huckleberry field at about 2/3-3/4 of the way through the loop. We made plans to do the 3 mile loop and filled our backpacks with ziplock containers to carry our bounty. We set out, for the second time (apparently you can't take dogs... boo), with high hopes. But wouldn't you know it, the silly Pacific Northwest weather this year strikes again. Right when you have plans for berries, you hit them too early in the season. So we hauled our plastic containers back to the car full of air. Bummer. Guess the store will be getting my business to buy some blueberries.

While the Peach Butter was in the oven, BLee and I started making bluebarb. We stripped the stalks of the ribs and chopped the rhubarb, only to find I had slightly less than called for. After some discussion, we decided we had more blueberries than we needed, so we would just compensate with them to get the right amount of fruit.


BLee was astonished at the amount of sugar, so we split it up to 5 cups sugar and 2 cups Splenda. After we had added all the ingredients, I started looking at the box of Certo.  It contained two 3 oz foil bags of liquid pectin. Upon close examination, I found that the box I had purchased a week ago at QFC had an expiration date of October 2009. Why the heck was that still on the shelf?!?! I have half a mind to take my box in there and talk to a manager. It's cheap, so I don't necessarily want a refund, I just want them to check their products closer so they aren't stocking bad stuff because sheesh, that's ridiculous!


Right before canning, we thought that it didn't seem to be firming very well, but processed the jars anyway. Later that night they still hadn't set up very well. A week later, they're still a syrup. A tasty syrup, but still syrup instead of jam.  I'm not sure if this is due to the Splenda/sugar change out, the expired Certo, or not enough time on the stovetop. Some jams take up to two weeks to set up, but I don't think this stuff is hardening. My plan: pop the jars, throw it into a pot with half a packet of powdered SureJell (because I have it on hand), heat to boiling, and re-can it. If that doesn't work I don't think anything will.

Yes, I'm wearing a half apron as a bib. I was worried about splatter.


But I may keep one small jar of syrup around for pancakes this weekend...

Bluebarb jam
Arliss Redekopp/ the Oelkers Family Cookbook

1/4 cup water
3 cups finley cut rhubarb
3 cups crushed blueberries (fresh or frozen)
7 cups sugar
1 (6 oz) bottle Certo

Simmer rhubarb and water gently until tender.  Combine with blueberries in large saucepan.  Add sugar, mix.  Place over high heat; bring to a full rolling boil and boil hard for 1 minute, stirring constantly.  Remove from heat, add pectin (Certo).  Stir and skim for 5 minutes.  Ladle into hot sterilized glasses.  Cover at once with thin layer or paraffin, or hot water bath can.  Makes about 9 half pints.

Peachy Keen

I got a bee in my bonnet about doing some home canning. I had, of course, already successfully made orange marmalade and kind of failed at lemon curd, but I wanted to try to make REAL jam the REAL way. You know, like my mom used to. And my grandma. And people everywhere during the depression era.

Some would say that I was trying to save money. Others, that know me better, would say that I was just bored and looking for new recipes. Me, I just think I was trying to learn a new skill that I will (hopefully) use the rest of my life. So there.

I talked my mom in to giving me some of her old canning jars that have been in the garage for years. Some of them were usable, some were not (didn't have lids or were not "canning" jars). But I had big plans for canning, so I purchased some more. Luckily, everything related to canning is on sale right now at grocery stores, so I made a big purchase -- a 21 quart canning pot! It was on sale for $17 and I think a very worth while purchase.


Come October, apples will be cheap as dirt - or cheaper because Mom and Dad will be trying to pawn off their excess on me (and I will like it). So, first off, I decided on apple butter. An old roommate of mine had a quart of the stuff when we moved in and we devoured it. Hopefully I'll be able to get her mom's recipe (hey, J, can you hook me up?). But for now, I decided peaches were in season and would be just as delicious.


Last weekend when I was camping (but that's another post) we drove in to Naches to visit the farm stands. I ended up with 10lbs of peaches in the car for a measly $7! Not sure if it was because it was closing time on a Sunday afternoon and they were trying to get rid of their produce or if that's really just how cheap peaches are at fruit stands in E.Wa. I had a day and a half left of camping, so the sat in my car making it smell divine until I got home. Then they perfumed my "Costco closet" until I wrangled up a friend (BLee) to help with the process.


The recipe calls for peeled peaches, so we did what Alton Brown told me to do when peeling a lot of peaches (you know I always listen to Alton, he's so.... scientifically proven), put them in a hot water bath for a minute and then an ice bath. The skins just slid right off!


After peeling,you place the peaches in a bowl of water and lemon juice to prevent browning. We did this, but in the next step it doesn't say whether they should be drained before boiling or not, so we went with no in an effort to decrease the moisture that would later be cooked away in the oven.


Our peaches took about 2 hours in the oven to reach the correct "mounding" state, then we hot water-bath canned them so we didn't have to store them in the fridge. We multitasked by making bluebarb jam while it was in the oven, but that's another post...


Simple Peach Butter
Tasty Kitchen

10 lbs peaches, approximately 25 medium peaches
5 cups sugar
1 whole lemon, juiced

Skim peaches by immersing them whole into boiling water for 1 minute.  Remove them into a bowl of cool water.  While peaches are cooling, place 2 cups of water and juice of 1 lemon in a large bowl.  This will prevent the peaches from browning.  Peel and pit the peaches, placing them in the lemon water.

In large pot, crush the pitted peaches 1 cup at a time using a potato masher.  Keep track of the number of cups of peaches you crush in the event you need to adjust the proportions of sugar to fruit.  Many recipes call for a ratio of 1/2 cup sugar to 1 cup crushed fruit.  The sugar here is reduced for a fruitier tasting butter.

On medium heat, bring the crushed peaches to a boil, being careful not to scorch them.  Add the sugar and bring back to a boil.  Preheat oven to 300 degrees.  When the peach mixture comes to a boil, remove from heat and transfer 3/4 of the mixture to shallow baking dishes (13 x 9 works fine) and place in the preheated oven. Stir the butter every 15 minutes.  As it cooks down, add the reserved peach/sugar mixture.  When the butter mounds nicely in a spoon, it is ready.  This will take 1-1 1/2 hours depending on the moisture content of your peaches.

When the butter is at the correct consistency, hot-pack or bottle in sterilized glass containers.  Once cooled, store in the refrigerator.  Makes 12 half-pint jars. 


To Can: Sterilize clean jars in hot water for at least 10 minutes. Place lids in hot water bath for 5 minutes to activate sticky stuff.  Just prior to filling, remove jars from water.  Fill with a sterilized ladle and funnel. Clean the rim of jar with wet paper towel to remove drips.  Dirty lids won't allow a proper seal in the hot water bath. Remove lid from water bath with lid lifter and place on cleaned jar.  Screw on lid band to finger tight. Place filled, closed jar in hot water bath. Bring bath to a boil and boil for ten minutes.  Remove from heat and let sit for five minutes.  Remove jars from bath and let sit for 12-24 hours in cool, draft-free location.  Check seals and reprocess if lids pop back up when pressed with finger. 

Monday, June 21, 2010

Somewhat-Canned Curd.


At some point on Friday I decided I was going to make lemon curd. I'm not quite sure how the idea came about, but I think it had something to do with a bag of lemons on sale for $1.88 and a craving for lemon bars.

I found a recipe on the web that made a big batch that required canning. Perfect! I had just bought a flat of pint jars at Fred Meyer and they were still in the back of my car. The recipe said it made 7 half-pint jars, so I pulled out four to wash and prep.


The curd needed the zest and juice of 8 lemons. EIGHT LEMONS!! That's a lot of lemons.  Good thing they were so cheap. I keep meaning to buy a micro-planer for zesting, but always come up with excuses why I don't need to spend the money. Consequently, the only tool in my kitchen that will adequately zest is the tiny-side of our beat up grater. Due to the quantity of lemons (EIGHT!) that required zesting, I got creative.


First, I washed the lemons. They was dirty. Then, I used the monkey peeler (the best of the 6 that we own. No joke.) to get off all the skin, but left the pith on the fruit. This was SO much quicker than zesting. Then I threw it all into the food processor to make it zest-sized.


Perfect! The zest and juice get cooked on low heat with sugar and butter, then you toss in a crap load of eggs. Everything was going swimmingly until I decided to skip the step where you strain your eggs through a fine sieve. Bad move. The result was little bits of albumen, etc. that cooked on their own and instead of making it creamy, it left little bits of cooked egg. Still tasty, but kinda weird to see clumps in your curd.

At this point I was ready to can, but the kitchen was a mess. A messy kitchen always makes me a bit frantic, and I'm beginning to think that canning does, too. Probably just because I haven't done it enough and don't know the tricks of the trade.

One of those "tricks" is apparently to have the appropriate sized pot for your water bath. Unfortunately, I had just assumed that my giant pot was big enough to cover my pint jars with one inch of water and didn't check it. Completely full to the brim, there were about 3mm of water over the jars. This required my third frantic call home to Mom, the expert in all things Home Ec. After some troubleshooting, the only solution I came up with was to scrounge around the house for all my tiny jars that at one point held marmalade or homemade concoctions I had acquired from other people. These guys ranged from 1/4 to 1/2 pint and met the "must-be-less-than-this-tall-to-can" requirement.

After cooling, I had three 1/4 pint jars, two 1/2 pint jars, and two pint jars (with sketchy seals) full of lemon curd. Had I not eaten some, or spilled a crap load when transferring from pint to 1/4 pint, I would have had at least another 1/2 pint jar full. I will have to find some good recipes to make in the near future to use up the two pint jars. Otherwise I may just eat it all on toast for every meal, and while that may be super tasty, the 25 pounds I would gain from eating scones all day would really put a damper on my 5K plans in August.


Homemade Lemon Curd
posted on Tasty Ktichen

8 whole lemons, zested and juiced
2 1/2 cup sugar
2 cups (1lb) unsalted butter
8 eggs, beaten

1. Finely grate zest of lemons into medium sauce pan. Squeeze juice from the lemons. You should have around 1 1/2 cup of juice. Add lemon juice, sugar, and cubed butter to sauce pan.

2. Heat pan over low heat until sugar has dissolved and butter has melted.  Strain eggs through a fine-mesh sieve into lemon mixture. Cook for 10-15 minutes, stirring constantly. As mixture steams it will thicken into a creamy consistency and coat the back of a spoon.

3. Remove from heat. Fill hot, sterilized canning jars to 1/8 of an inch from the rims. Wipe rims clean and top with hot lids. Screw on bands to finger tight. Process jars in hot water bath (212F) for ten minutes.  Make sure the water covers lids by more than 1 inch. Remove jars immediately and set upright on towel in away from drafts. Allow to cool 12 hours. Check for proper seals. Label the jars and store in a cool, dry place for up to one year.

Makes 7 half-pint jars.

Monday, April 19, 2010

Marmalady.

I decided last week that I needed to do something adventurous with a handful of oranges I had in the fridge that were about to go bad. At Heather's suggestion, I decided on Orange Marmalade. I've never made jam before, so I scoured the internet for a good recipe that wouldn't be too hard or call for any crazy ingredients. My first thought was Alton Brown (oh how I love Good Eats) because I think I saw an orange show he did. Somehow on the Food Network website I stumbled upon the Barefoot Contessa's recipe and decided it was the one.


Anna's Orange Marmalade
from the Barefoot Contessa

4 large seedless oranges
2 lemons
8 cups sugar

Cut the oranges and lemons in half crosswise, then into very thin half-moon slices. Discard any seeds. Place the sliced fruit and their juices into a stainless-steel pot. Add 8 cups of water and bring the mixture to a boil, stirring often. Remove from the heat and stir in the sugar until it dissolves. Cover and allow to stand overnight at room temperature.

The next day, bring the mixture back to a boil. Reduce the heat to low and simmer uncovered for about 2 hours. Turn the heat up to medium and boil gently, stirring often, for another 30 minutes. Skim off any foam that forms on teh top. Cook the marmalde until it reaches 220 degrees F on a candy thermometer. If you want to be doubly sure it's ready, place a small amount on a plate and refrigerate it until it's cool but not cold.  If it's firm - neither runny nor too hard - it's done. It will be a golden orange color. (If the marmalade is runny, continue cooking it and if it's too hard, add more water.)

Pour the marmalade into clean, hot Mason jars; wipe the rims thoroughly with a clean damp paper towel and seal with lids. Store in the pantry for up to a year.


Holy crap, what a production this was. I think every time Leda came home last week it was to me, standing in the kitchen, yelling at some oranges in a pot.

I modified this recipe a little bit after I read all of the comments on the website. I used three oranges - one whole, one peeled, and one zested (sliced into matchsticks) and peeled. Then I added two mandarins because it didn't seem like enough chunks in the water. I added two cinnamon sticks to the boiling water, and only added 5 cups of sugar.

The second day of cooking took forever. I was using a pot that was the appropriate size, but doesn't exactly have the flattest bottom, so getting to the boiling point took a lot longer than usual. I let the sauce simmer for about 2.5 hours before bringing it back to a boil. At this point I got a little worried because I don't have a candy thermometer. I boiled it for a good 40 minutes or so without noticing it hardening too much. After another 10-15 I got scared and decided it would be better to have syrup than brick and canned it. The whole time I was melting the wax for the top of the jars I was thinking, "This is a bad idea, this is a bad idea."

After sitting in the fridge overnight, all of the jars were still liquid. So I slaved over a hot stove for the third day in a row. Finally, FINALLY, it started to harden. I set aside a cup and a half to use in another recipe, and canned only three jars (probably 2.5 cups).

It's delicious. But is delicious really worth three full evenings in front of the stove when its sunny out?