I always seem to misplace this recipe right when I need it, which is for Thanksgiving. Or really any potluck, but always Thanksgiving. The traditional salad didn't get
served with lunch, but with turkey and rolls for dinner after the meal
was over. Love this salad, as basic as it is. Posted for easy access later.
Layered pea salad
Layer the following in a 13x9 inch pan:
1 head iceberg lettuce
1/2 cut diced green pepper
1/2 cut diced celery
1 scant cup diced onion
2 cups mayo mixed with 2 Tbsp sugar for dressing
8 oz shredded cheddar cheese
8-12 pieces of bacon, fried to crispy and crumbled

Showing posts with label recipe. Show all posts
Showing posts with label recipe. Show all posts
Tuesday, November 25, 2014

Thursday, March 14, 2013
Fudge Bites
A friend just "pinned' a version of these pseudo-healthy fudge bites that looked delicious. But... I'm not that organic. I don't keep carob or coconut oil around the house. And then when I followed the links back, and back further, and back further, the hippy recipe she pinned was just bunch of modifications away from a real recipe I could get behind. Real as in for normal people. Who stock a normal pantry. You know, like you're from the midwest. And I had all the ingredients. Because I'm that girl. Not the hippy.
All that being said, I kind of think the coconut oil might taste good. I might have to find some. Stupid Seattle. It's infecting me with hippy-dom.
PB Fudge
1/4 cup butter, melted and cooled
1/4 cup cocoa powder
1/4 cup peanut butter
1/8 cup honey
1/4 tsp vanilla
Mix ingredients together. Pour into lined or greased mini muffin tin and cool in refrigerator or freezer until solid. Store in ziptop bag in fridge.Makes 15 mini fudge bites.
I forgot to grease my tiny muffin tin and they refused to come out in one piece, so they will become fudge "balls". Next time forget this muffin thin thing. I'm going for a square pan and cutting them. Sheesh.
I'm not linking a source because this recipe has been butchered so many times around the internet. Modifications include coconut oil or olive oil instead of butter, carob instead of cocoa, almond or other butter, instead of peanut butter, straight up almonds ground in the food processor instead of peanut butter, and maple syrup for honey (I guess coconut oil and maple syrup would make it vegan. If you're into that kind of thing). They all make double this amount, too, but hey, I know myself. Having that much fudge around the house is a recipe for disaster.
All that being said, I kind of think the coconut oil might taste good. I might have to find some. Stupid Seattle. It's infecting me with hippy-dom.
PB Fudge
1/4 cup butter, melted and cooled
1/4 cup cocoa powder
1/4 cup peanut butter
1/8 cup honey
1/4 tsp vanilla
Mix ingredients together. Pour into lined or greased mini muffin tin and cool in refrigerator or freezer until solid. Store in ziptop bag in fridge.Makes 15 mini fudge bites.
I forgot to grease my tiny muffin tin and they refused to come out in one piece, so they will become fudge "balls". Next time forget this muffin thin thing. I'm going for a square pan and cutting them. Sheesh.
I'm not linking a source because this recipe has been butchered so many times around the internet. Modifications include coconut oil or olive oil instead of butter, carob instead of cocoa, almond or other butter, instead of peanut butter, straight up almonds ground in the food processor instead of peanut butter, and maple syrup for honey (I guess coconut oil and maple syrup would make it vegan. If you're into that kind of thing). They all make double this amount, too, but hey, I know myself. Having that much fudge around the house is a recipe for disaster.
Thursday, March 7, 2013
Mad Dash Cookies
Why would you ever make any kind of chocolate chip cookies that weren't the original Toll House recipe? It's simply the best.
However.
Last night I had a craving for a cookie and I wanted it NOW. I didn't want to set out the butter to warm to room temperature (I don't have a microwave), and, well, I really didn't want a ton of calories, and I didn't want to make a huge batch because I don't need them around the house all weekend, but I NEEDED A COOKIE.
So I made a "mad dash" into the kitchen and threw these together. And I think they turned out pretty dang good, if I do say so myself. Not back for a late night gluttonous craving and a strange desire at low-ish fat.
Mad Dash Cookies
ie modified Toll House Cookies
1/4 cup room temperature butter
1/3 cup sugar
1/3 cup brown sugar
1/4 cup unsweetened applesauce
1 egg
1/2 tsp vanilla
1/2 tsp baking soda
1/2 tsp salt
1 cup flour
1+ cup rolled oats
a handful or two of chocolate chips
a handful of golden raisins
Beat butter until smooth, add sugars. Mix in applesauce (applesauce mixes in better if you cream the butter and sugars first). Add egg and vanilla. Beat in baking soda, salt, and flour, 1/3 cup at a time.
At this point you've essentially made a half batch of Toll House cookies, but with half the butter traded for applesauce (I keep small portion-sized containers of applesauce around for baking. They come in 1/2 cup containers, so you get to eat the other half while baking!). Now comes the fun part - adding whatever the hell you want. Sometimes I add as many oats as I can and still have the dough stick together, but I wanted more of a fattening feel to these guys, so I just poured in some, mixed, then poured in a bit more until I got to the consistency I wanted. Then I added a handful of chocolate chips (and then another, but don't tell). My raisins were all stuck together so it was hard to judge how many I broke off into the dough, but I'd guess maybe 1/2 cup or so. Mix it all together and adjust mix-ins to your heart's content. I thought about adding craisins, too, but thought that was going to cover up the gluttonous nature of a chocolate chip cookies, so I left them out.
Bake at 350 for 9 minutes and 30 seconds. Don't let the applesauce fool you - these guys need about 30 more seconds than they look like they do. Otherwise you cookies are a bit gooey. Which is fine, if that's what you're going for. But I'd suggest the extra 30.
Makes 24 cookies. Less if you eat as much cookie dough as I did.
YUM.
However.
Last night I had a craving for a cookie and I wanted it NOW. I didn't want to set out the butter to warm to room temperature (I don't have a microwave), and, well, I really didn't want a ton of calories, and I didn't want to make a huge batch because I don't need them around the house all weekend, but I NEEDED A COOKIE.
So I made a "mad dash" into the kitchen and threw these together. And I think they turned out pretty dang good, if I do say so myself. Not back for a late night gluttonous craving and a strange desire at low-ish fat.
 |
| Sneakily healthy. Kinda. |
Mad Dash Cookies
ie modified Toll House Cookies
1/4 cup room temperature butter
1/3 cup sugar
1/3 cup brown sugar
1/4 cup unsweetened applesauce
1 egg
1/2 tsp vanilla
1/2 tsp baking soda
1/2 tsp salt
1 cup flour
1+ cup rolled oats
a handful or two of chocolate chips
a handful of golden raisins
Beat butter until smooth, add sugars. Mix in applesauce (applesauce mixes in better if you cream the butter and sugars first). Add egg and vanilla. Beat in baking soda, salt, and flour, 1/3 cup at a time.
At this point you've essentially made a half batch of Toll House cookies, but with half the butter traded for applesauce (I keep small portion-sized containers of applesauce around for baking. They come in 1/2 cup containers, so you get to eat the other half while baking!). Now comes the fun part - adding whatever the hell you want. Sometimes I add as many oats as I can and still have the dough stick together, but I wanted more of a fattening feel to these guys, so I just poured in some, mixed, then poured in a bit more until I got to the consistency I wanted. Then I added a handful of chocolate chips (and then another, but don't tell). My raisins were all stuck together so it was hard to judge how many I broke off into the dough, but I'd guess maybe 1/2 cup or so. Mix it all together and adjust mix-ins to your heart's content. I thought about adding craisins, too, but thought that was going to cover up the gluttonous nature of a chocolate chip cookies, so I left them out.
Bake at 350 for 9 minutes and 30 seconds. Don't let the applesauce fool you - these guys need about 30 more seconds than they look like they do. Otherwise you cookies are a bit gooey. Which is fine, if that's what you're going for. But I'd suggest the extra 30.
Makes 24 cookies. Less if you eat as much cookie dough as I did.
YUM.
Friday, February 15, 2013
Easiest Peanut Butter Cookies Ever.
One cup of peanut butter.
One cup of sugar.
One egg.
One tsp baking powder.
One tsp vanilla.
Ten minutes at 350.

BOOM.
Delicious.
One cup of sugar.
One egg.
One tsp baking powder.
One tsp vanilla.
Ten minutes at 350.

BOOM.
Delicious.
Thursday, December 13, 2012
Chocolate Crackle Cookies and an education
This weekend we have to make 300 cookies to hand out as holiday packages. They are going in a box with peanut brittle and something else, so they have to be non-peanuty, travel well, and be able to handle a few days of shipping time and still taste good.
After much consideration and a nixing of peanut butter blossoms as being too fragile (they like to lose their kisses), we decided on Chocolate Crackle Cookies. You know, those delicious chocolate morsels covered in powdered sugar?
We got the recipe from Alan's mom and made a test batch last week. They were super tasty, but Alan frumped about the house for a while because they weren't exactly like his mom's. Ours were chewy and a little brownie-like, but flat and the powdered sugar wasn't evenly dispersed. His mom's are fluffy and look like what you expect from chocolate crackle cookies, a la Martha Stewart, even though they use different recipes.
Where did we go wrong? We followed the recipe, so we knew that wasn't it. Maybe my baking powder was bad? ....No, I just bought a new container. So I did a little research.
I found some things that I didn't instictually know, like....
* more baking soda = thinner cookies.
*Eggs = puff, so replacing eggs with milk = flatter cookie.
*Butter batters are more likely to spread because butter converts from fat to liquid at a low temperature.
*Crisco, or shortening, melts at a higher temp, so they will stay fluffier with more loft before setting.
*More white sugar in the white-to-brown ratio means a crispier cookie. (I always thought of it as more brown sugar means more chewy)
*Baking powder instead of baking soda adds acid and makes a fluffier cookie.
*Cold dough spreads slowly.
*The smaller the scoop, the more fluff to the cookies.
*Parchment paper absorbs more fat, so use paper instead of a Silpat if you want crispier cookies.
* Silpats retain heat and are not so good if cooking chilled doughs.
So what was a our problem? Oh, a myriad of things. Most notably, I think, are that we chilled the dough for only one hour. It appeared thick and solid, but other recipes I've found have said to chill for at least two hours. Also, I'm thinking the Silpat was partly to blame for the same reason - not cool enough.
I have read in a blog post or two, including the earlier link to Bakerella, that cookies rolled in powdered sugar should be rolled in granulated sugar first because the powdered sugar just melts into the dough when it gets hit with the heat. So if when we make 6 batches of them this weekend we'll try it both ways, sugar and no sugar, and report back. Hopefully somewhere we'll find success!
Chocolate Crackle Cookies
From Alan's Mom (potentially from Taste of Home?)
1 cup semi-sweet chocolate chips
1 cup packed brown sugar
1/3 cup oil
2 eggs
1 tsp vanilla
1 cup flour
1 tsp baking powder
1/4 tsp salt
powdered sugar for rolling
Melt chocolate chips in double boiler. Allow to cool but not solidify. Add sugar and oil; mix. Add eggs, one at a time, and beat well. Add vanilla. In separate bowl, sift flour, baking powder and salt. Add to chocolate mixture in three installments, scraping bowl between additions. Chill dough at least 2 hours. Roll about 1 tsp dough into a ball and roll in powdered sugar to coat. Bake at 350 for 10-12 minutes.
Makes about 4 dozen cookies.
After much consideration and a nixing of peanut butter blossoms as being too fragile (they like to lose their kisses), we decided on Chocolate Crackle Cookies. You know, those delicious chocolate morsels covered in powdered sugar?
We got the recipe from Alan's mom and made a test batch last week. They were super tasty, but Alan frumped about the house for a while because they weren't exactly like his mom's. Ours were chewy and a little brownie-like, but flat and the powdered sugar wasn't evenly dispersed. His mom's are fluffy and look like what you expect from chocolate crackle cookies, a la Martha Stewart, even though they use different recipes.
Where did we go wrong? We followed the recipe, so we knew that wasn't it. Maybe my baking powder was bad? ....No, I just bought a new container. So I did a little research.
I found some things that I didn't instictually know, like....
* more baking soda = thinner cookies.
*Eggs = puff, so replacing eggs with milk = flatter cookie.
*Butter batters are more likely to spread because butter converts from fat to liquid at a low temperature.
*Crisco, or shortening, melts at a higher temp, so they will stay fluffier with more loft before setting.
*More white sugar in the white-to-brown ratio means a crispier cookie. (I always thought of it as more brown sugar means more chewy)
*Baking powder instead of baking soda adds acid and makes a fluffier cookie.
*Cold dough spreads slowly.
*The smaller the scoop, the more fluff to the cookies.
*Parchment paper absorbs more fat, so use paper instead of a Silpat if you want crispier cookies.
* Silpats retain heat and are not so good if cooking chilled doughs.
So what was a our problem? Oh, a myriad of things. Most notably, I think, are that we chilled the dough for only one hour. It appeared thick and solid, but other recipes I've found have said to chill for at least two hours. Also, I'm thinking the Silpat was partly to blame for the same reason - not cool enough.
I have read in a blog post or two, including the earlier link to Bakerella, that cookies rolled in powdered sugar should be rolled in granulated sugar first because the powdered sugar just melts into the dough when it gets hit with the heat. So if when we make 6 batches of them this weekend we'll try it both ways, sugar and no sugar, and report back. Hopefully somewhere we'll find success!
Chocolate Crackle Cookies
From Alan's Mom (potentially from Taste of Home?)
1 cup semi-sweet chocolate chips
1 cup packed brown sugar
1/3 cup oil
2 eggs
1 tsp vanilla
1 cup flour
1 tsp baking powder
1/4 tsp salt
powdered sugar for rolling
Melt chocolate chips in double boiler. Allow to cool but not solidify. Add sugar and oil; mix. Add eggs, one at a time, and beat well. Add vanilla. In separate bowl, sift flour, baking powder and salt. Add to chocolate mixture in three installments, scraping bowl between additions. Chill dough at least 2 hours. Roll about 1 tsp dough into a ball and roll in powdered sugar to coat. Bake at 350 for 10-12 minutes.
Makes about 4 dozen cookies.
Tuesday, November 6, 2012
Monster Cookies
I made these in high school for some event and they were affectionately nicknamed the "Patriotic Turd Cookies" due to the red white and blue M&Ms and the fact that they're gloopy and kind look like... well, no, they really don't. That's just Sarah for you.
My mom also made them for our trip to Oregon a few weeks ago and they were gone in a flash. YUM!!
In case you ever need to make cookies to feed an army, this is the recipe for you.
Monster Cookies
2 2/3 cups brown sugar
2 cups white sugar
1/2 lb butter
6 eggs
1 1/2 tsp karo syrup
1 1/2 lb jar chunky peanut butter (use the "good" stuff, i.e., Jiff or Skippy. None of that Natural crap.)
4 tsp baking soda
1 1/2 tsp vanilla
9 cups quick cooking oatmeal
1 package chocolate chips
1 package plain M&Ms
1 package peanut M&Ms
In very large bowl, cream butter and white and brown sugars. Add eggs and karo syrup. Mix in peanut butter, baking soda, and vanilla. Stir until combined. Add oats, chocolate chips and M&Ms. Stir just until combined.
Bake at 350F for approximately 12 minutes. Do not overbake.
Makes LOTS of cookies.
My mom also made them for our trip to Oregon a few weeks ago and they were gone in a flash. YUM!!
In case you ever need to make cookies to feed an army, this is the recipe for you.
Monster Cookies
2 2/3 cups brown sugar
2 cups white sugar
1/2 lb butter
6 eggs
1 1/2 tsp karo syrup
1 1/2 lb jar chunky peanut butter (use the "good" stuff, i.e., Jiff or Skippy. None of that Natural crap.)
4 tsp baking soda
1 1/2 tsp vanilla
9 cups quick cooking oatmeal
1 package chocolate chips
1 package plain M&Ms
1 package peanut M&Ms
In very large bowl, cream butter and white and brown sugars. Add eggs and karo syrup. Mix in peanut butter, baking soda, and vanilla. Stir until combined. Add oats, chocolate chips and M&Ms. Stir just until combined.
Bake at 350F for approximately 12 minutes. Do not overbake.
Makes LOTS of cookies.
Monday, October 15, 2012
Butternut Squash Soup
I can't believe I haven't posted this recipe yet. We make it all the time in the fall and winter, pretty much as soon as we can find butternut squash until they're no longer in stores in the spring. It's a perfect combination of squash that I love, and a squash recipe that Alan really enjoys! For some reason he isn't into the roasted half acorn squash....

Golden Winter Soup
Originally from Cooking Light, passed to me by B.Lee
2 Tbsp butter
5 cups peeled and cubed butternut squash
2 cups peeled and cubed potato
2 tsp salt
1 tsp peper
2 cups chopped leek (1 large or 2 smaller)
4 cups broth
1 cup fat free 1/2 and 1/2
Melt butter over medium high heat. Add squash, potato, salt and pepper and cook for 3 minutes. Add leek and saute 1 more minute. Add broth and bring to a boil; reduce heat and simmer until squash and potatoes are fork tender. Blend with and immersion blender until no lumps remain. Add more broth if too thick. Stir in half and half and cook until heated through. Garnish with shredded parm and a sprinkle of thyme.
Its soup, so I'm never too exact with the measurements. I'll throw in the whole squash if it's on the smaller side, or just the neck if it's a big squash. If I have potatoes that are just past their prime I'll throw in two instead of just one. I find I like to add a couple of dashes of garlic salt to jazz it up (but I pretty much add a dash of garlic salt to everything). The original recipe suggested some crazy roasted baguette with gruyere thing to go with it, but we're not fancy around these parts - we stick to whatever bread we have on hand slathered with butter and a little garlic salt (see?) and grated parm broiled until brown. As Alan said last night, the soup makes a really good bread delivery device.

Golden Winter Soup
Originally from Cooking Light, passed to me by B.Lee
2 Tbsp butter
5 cups peeled and cubed butternut squash
2 cups peeled and cubed potato
2 tsp salt
1 tsp peper
2 cups chopped leek (1 large or 2 smaller)
4 cups broth
1 cup fat free 1/2 and 1/2
Melt butter over medium high heat. Add squash, potato, salt and pepper and cook for 3 minutes. Add leek and saute 1 more minute. Add broth and bring to a boil; reduce heat and simmer until squash and potatoes are fork tender. Blend with and immersion blender until no lumps remain. Add more broth if too thick. Stir in half and half and cook until heated through. Garnish with shredded parm and a sprinkle of thyme.
Its soup, so I'm never too exact with the measurements. I'll throw in the whole squash if it's on the smaller side, or just the neck if it's a big squash. If I have potatoes that are just past their prime I'll throw in two instead of just one. I find I like to add a couple of dashes of garlic salt to jazz it up (but I pretty much add a dash of garlic salt to everything). The original recipe suggested some crazy roasted baguette with gruyere thing to go with it, but we're not fancy around these parts - we stick to whatever bread we have on hand slathered with butter and a little garlic salt (see?) and grated parm broiled until brown. As Alan said last night, the soup makes a really good bread delivery device.
Wednesday, August 15, 2012
Found a Tomato Winner
Every day I come inside with my hands full of little cherry tomatoes. They're bright yellow and call for me to eat them, but I have been hoarding them for about a week now. Why, you ask? Well, I flipped through the August issue of Cooking Light at work the other day and found a pasta dish that called for oven roasting cherry tomatoes and I was dying to try it with the sungolds from my yard.
Unfortunately I ate it all before I thought about blogging about the recipe, so there isn't an accompanying photo, but I'm sure I'll make it again before the tomatoes are done and will take one then.
The proof this recipe is a winner? Mr. Tomato-Hater thought it was really good. He even said "I'd eat that again." Woohoo!!
Pasta with Roasted Tomatoes
Slightly modified from Cooking Light
12 oz uncooked spaghetti
4 Tbsp olive oil
3 cups cherry tomatoes
2 heaping tsp crushed garlic
salt and pepper to taste
2 oz parmesan cheese, shaved or shredded
1 tsp dried basil
1/4 cup fresh basil, chiffonade
Preheat oven to 450.
Boil salted water in large saucepan for noodles. Cook noodles 10 minutes, or until preferred doneness.
While noodles are cooking, mix tomatoes, garlic, and 2 Tbsp olive oil. Place on baking sheet and cook in oven for 11 minutes or until browning and bursting.
When spaghetti is almost done, place 6 Tbsp of pasta water in small saucepot. Add 2 Tbsp olive oil. Boil for 4 minutes, or until reduced to approximately 1/3 cup.
Drain remaining pasta water once spaghetti is cooked. Add roasted tomato, garlic, and oil mixture (make sure to include all of the juices from the burst tomatoes); salt and pepper to taste. Add reduced oil and water sauce. Add half of the parmesan and the dried basil.
Serve with more parmesan and fresh basil sprinkled on top.
Supposedly served 4, but it served the two of us, with one getting a hefty second helping. There was plenty of sauce, so in my version the amount of noodles is increased. If you like a scant coating of sauce, the noodles could be increased to almost 16 oz.
Unfortunately I ate it all before I thought about blogging about the recipe, so there isn't an accompanying photo, but I'm sure I'll make it again before the tomatoes are done and will take one then.
The proof this recipe is a winner? Mr. Tomato-Hater thought it was really good. He even said "I'd eat that again." Woohoo!!
Pasta with Roasted Tomatoes
Slightly modified from Cooking Light
12 oz uncooked spaghetti
4 Tbsp olive oil
3 cups cherry tomatoes
2 heaping tsp crushed garlic
salt and pepper to taste
2 oz parmesan cheese, shaved or shredded
1 tsp dried basil
1/4 cup fresh basil, chiffonade
Preheat oven to 450.
Boil salted water in large saucepan for noodles. Cook noodles 10 minutes, or until preferred doneness.
While noodles are cooking, mix tomatoes, garlic, and 2 Tbsp olive oil. Place on baking sheet and cook in oven for 11 minutes or until browning and bursting.
When spaghetti is almost done, place 6 Tbsp of pasta water in small saucepot. Add 2 Tbsp olive oil. Boil for 4 minutes, or until reduced to approximately 1/3 cup.
Drain remaining pasta water once spaghetti is cooked. Add roasted tomato, garlic, and oil mixture (make sure to include all of the juices from the burst tomatoes); salt and pepper to taste. Add reduced oil and water sauce. Add half of the parmesan and the dried basil.
Serve with more parmesan and fresh basil sprinkled on top.
Supposedly served 4, but it served the two of us, with one getting a hefty second helping. There was plenty of sauce, so in my version the amount of noodles is increased. If you like a scant coating of sauce, the noodles could be increased to almost 16 oz.
Friday, March 30, 2012
How To: Make a Meal from the Pantry
It started with a desire to make a recipe I saw online, as it usually does. But I filed it away in my brain as something to make later. I knew I would have the ingredients on hand so I wasn't worried about hitting the grocery store before making them.
Then I saw another recipe a friend pinned on Pinterest, and the just fit so well together, and I had all of the ingredients on hand for that recipe, too, so I had to do it.

Spicy Black Bean Burgers
Modified From Tasty Kitchen
1 can black beans, rinsed
1/2 onion, cut in wedges
1 red pepper, seeds removed
3 cloves garlic
1 egg
1 tsp onion powder
1 tsp cumin
1 tsp chili powder
1 tbsp Sriracha sauce
1/2 tsp salt
1/2 tsp pepper
1-2 cups panko bread crumbs
olive oil
Place black beans in a bowl and mash with fork or potato masher. Set aside.
Place onion, pepper, and garlic on cookie sheet and broil until the lightly brown. Blend in food processor until a smooth consistency. Add to black bean mixture. If there is extra liquid, strain through fine mesh strainer.
Add egg, onion powder, cumin, chili powder, Sriracha, salt and pepper to bean mixture and stir well to combine. Mixture can be refrigerated at this point for up to two days. Add enough bread crumbs (~1/2 - 3/4 cup) to make a consistency that will stick together in a patty, but has some bulk to it. Form into 6 patties, thinner and wider rather than smaller and thicker. Coat both sides with panko.
Heat olive oil in nonstick skillet over medium-high heat. Gently place patties in skillet, being careful not to burn yourself on the hot oil. Cook 5- minutes on each side, or until both sides have a dark crust and are heated through.
Serve on bun with favorite toppings, including something to give it a little crunch, such as romaine lettuce, pickles, or onions.
40-Minute Hamburger Buns
From Taste of Home
2 tbsp active dry yeast
1 cup plus 1 tbsp warm water
1/3 cup vegetable oil or 1/4 cup butter
1/4 cup sugar
1 egg
1 tsp salt
3 to 3 1/2 cups bread flour
Dissolve yeast in water. Add oil and sugar and allow to sit for 5 minutes. Add egg, salt, and 3 cups of flour to form a soft dough.
Knead on floured surface for 3-5 minutes or until smooth and elastic. Immediately divide into 12 pieces for large rolls, 16 for medium rolls. Shape into balls and place 3 inches apart on a greased baking sheet (or a silpat or parchment paper lined baking sheet). Cover and let rise for 10 minutes. Heat oven to 425. Bake for 8-12 minutes, until tops are golden brown. Remove to a wire rack to cool. Makes 12-16 rolls.

Have I mentioned the newest trick I learned that I'm in love with? I had a spare spice shaker in the kitchen and I filled it with flour. Now when I'm kneading I just sprinkle from the shaker onto the surface and get a nice even layer across it instead of spooning a glob on and spreading it too thin with my hand. Magic! Also works wonders if my sauce needs to be a little thicker - just add two shakes of flour! More magic!
I took these to dinner at my nephew's house (three months old and he totally rules the roost there now). I made only 4 burger patties instead of six out of the recipe and they were a bit thick, in addition to being really soft in the middle. Next time I will definitely make them thinner and give them a good crust to add some crunch. The combination of very soft bun, soft burger, avocado and spinach made for a gummy, if tasty, dinner.
For dessert, I made another recipe that used only things on hand, and could quickly make right before heading out - Two Minute Cookies. Ahh, the wonderful tastes of childhood. No matter how bad for you they are, or how much sugar there is, they will always be delicious.

Two Minute Cookies
From Mom's Recipe Box
1/2 cup butter
1/2 cup milk
2 cups sugar
3 cups oatmeal
3 tbsp cocoa
1/2 cup coconut
1/2 cup raisins (optional)
In medium sauce pan, melt butter and add milk and sugar. Heat to rolling boil and cook for one minute. Remove from heat and add remaining ingredients. Quickly spoon into mounds on parchment or wax paper. Allow to cool for 5 minutes. Makes 30-36 depending on size and the cook's share.
PS. Be careful. It's a tomato jungle out there.

Then I saw another recipe a friend pinned on Pinterest, and the just fit so well together, and I had all of the ingredients on hand for that recipe, too, so I had to do it.

Spicy Black Bean Burgers
Modified From Tasty Kitchen
1 can black beans, rinsed
1/2 onion, cut in wedges
1 red pepper, seeds removed
3 cloves garlic
1 egg
1 tsp onion powder
1 tsp cumin
1 tsp chili powder
1 tbsp Sriracha sauce
1/2 tsp salt
1/2 tsp pepper
1-2 cups panko bread crumbs
olive oil
Place black beans in a bowl and mash with fork or potato masher. Set aside.
Place onion, pepper, and garlic on cookie sheet and broil until the lightly brown. Blend in food processor until a smooth consistency. Add to black bean mixture. If there is extra liquid, strain through fine mesh strainer.
Add egg, onion powder, cumin, chili powder, Sriracha, salt and pepper to bean mixture and stir well to combine. Mixture can be refrigerated at this point for up to two days. Add enough bread crumbs (~1/2 - 3/4 cup) to make a consistency that will stick together in a patty, but has some bulk to it. Form into 6 patties, thinner and wider rather than smaller and thicker. Coat both sides with panko.
Heat olive oil in nonstick skillet over medium-high heat. Gently place patties in skillet, being careful not to burn yourself on the hot oil. Cook 5- minutes on each side, or until both sides have a dark crust and are heated through.
Serve on bun with favorite toppings, including something to give it a little crunch, such as romaine lettuce, pickles, or onions.
40-Minute Hamburger Buns
From Taste of Home
2 tbsp active dry yeast
1 cup plus 1 tbsp warm water
1/3 cup vegetable oil or 1/4 cup butter
1/4 cup sugar
1 egg
1 tsp salt
3 to 3 1/2 cups bread flour
Dissolve yeast in water. Add oil and sugar and allow to sit for 5 minutes. Add egg, salt, and 3 cups of flour to form a soft dough.
Knead on floured surface for 3-5 minutes or until smooth and elastic. Immediately divide into 12 pieces for large rolls, 16 for medium rolls. Shape into balls and place 3 inches apart on a greased baking sheet (or a silpat or parchment paper lined baking sheet). Cover and let rise for 10 minutes. Heat oven to 425. Bake for 8-12 minutes, until tops are golden brown. Remove to a wire rack to cool. Makes 12-16 rolls.

Have I mentioned the newest trick I learned that I'm in love with? I had a spare spice shaker in the kitchen and I filled it with flour. Now when I'm kneading I just sprinkle from the shaker onto the surface and get a nice even layer across it instead of spooning a glob on and spreading it too thin with my hand. Magic! Also works wonders if my sauce needs to be a little thicker - just add two shakes of flour! More magic!
I took these to dinner at my nephew's house (three months old and he totally rules the roost there now). I made only 4 burger patties instead of six out of the recipe and they were a bit thick, in addition to being really soft in the middle. Next time I will definitely make them thinner and give them a good crust to add some crunch. The combination of very soft bun, soft burger, avocado and spinach made for a gummy, if tasty, dinner.
For dessert, I made another recipe that used only things on hand, and could quickly make right before heading out - Two Minute Cookies. Ahh, the wonderful tastes of childhood. No matter how bad for you they are, or how much sugar there is, they will always be delicious.

Two Minute Cookies
From Mom's Recipe Box
1/2 cup butter
1/2 cup milk
2 cups sugar
3 cups oatmeal
3 tbsp cocoa
1/2 cup coconut
1/2 cup raisins (optional)
In medium sauce pan, melt butter and add milk and sugar. Heat to rolling boil and cook for one minute. Remove from heat and add remaining ingredients. Quickly spoon into mounds on parchment or wax paper. Allow to cool for 5 minutes. Makes 30-36 depending on size and the cook's share.
PS. Be careful. It's a tomato jungle out there.

Monday, November 21, 2011
Kitchen Time
I spent a lot of time over the weekend in the kitchen. Granted half of that time was spent cleaning up after myself, but hey... that counts too, right?
Friday night was ravioli in tomato with oven roasted beets and homemade green been casserole (a practice for non-canned casserole for Thanksgiving) and pumpkin pudding (see the recipe on smittenkitchen - it was delicious) for dessert.
Saturday was chili and cornbread for the folks coming over to watch the Husky game.
Sunday was a last-minute-what-do-we-have-on-hand type meal. I pulled a pork roast out of the freezer in the morning and created a meal around it. Came up with butternut squash, chanterelle and baby pea risotto and kale chips as sides, and whooo-boy it was a fantastic meal.

Highly recommend.
Oven Roasted Pork Loin
I rubbed our 3lb loin with a full coating of Martha Stewart's All Purpose Meat Rub, then tossed it in the oven until the thermometer said 155 (Betty Crocker says 20 mins/lb, but I just used a thermometer), then let it rest for 10 minutes. It was absolutely moist and flavorful. No knife needed.
All Purpose Spice Rub
From Martha Stewart
1/3 cup coarse salt
1/4 cup packed brown sugar
1/4 cup paprika
2 Tbsp black pepper
2 Tbsp oregano
2 Tbsp thyme
1 Tbsp cayenne pepper
Mix all ingredients and store in an airtight container.
Note: I gave this out for Christmas last year. Not sure if anyone used it(?) but I think it's tasty.

Butternut Squash, Chanterelle and Baby Pea Risotto
Strongly butchered from the Seattle Times
3 cups butternut squash, diced
salt and pepper
Pam
2 tsp thyme
1 onion, diced
2 Tbsp butter
1 cup arborio rice
4 cups chicken stock
1 cup chanterelles, chopped, frozen*
1 cup frozen peas, thawed
1 cup grated Parmesan
Heat oven to 400 degrees. Spray baking sheet with Pam. Toss squash with a spritz of Pam, thyme, and salt and pepper to taste. Roast for 20 minutes, or until soft, stirring after 10 minutes. Set aside.
Pour stock into pot and heat to simmer.
Heat skillet over medium heat; melt butter. Add onion and saute until soft, about 3-5 minutes. Add rice. Cook, stirring constantly, for 2-3 minutes. Add 1 cup stock. Cook until all liquid is absorbed. Add chanterelles. Continue adding stock, 1/2-1 cup at a time, cooking until liquid is absorbed. After addign 3 1/2 cups stock, taste the rice. It should still have some chew but be tender. If necessary, add the remaining stock. Add peas and cooked squash. Remove from heat and stir in Parmesan cheese.

Kale Chips
1 bunch kale
Pam
Seasoning Salt
Heat oven to 350 degrees. Rinse kale. Remove leaves from stems. Discard stems. Tear or chop into bite sized pieces. Dry thoroughly in salad spinner or with paper towels. Spray baking sheet with Pam and layer kale. Spray tops with Pam and sprinkle with seasoning salt (I used Johnny's - MSG is delicious). Bake 10-15 minutes, or until edges are crispy but not burnt. Let cool, if you can resist.
Friday night was ravioli in tomato with oven roasted beets and homemade green been casserole (a practice for non-canned casserole for Thanksgiving) and pumpkin pudding (see the recipe on smittenkitchen - it was delicious) for dessert.
Saturday was chili and cornbread for the folks coming over to watch the Husky game.
Sunday was a last-minute-what-do-we-have-on-hand type meal. I pulled a pork roast out of the freezer in the morning and created a meal around it. Came up with butternut squash, chanterelle and baby pea risotto and kale chips as sides, and whooo-boy it was a fantastic meal.

Highly recommend.
Oven Roasted Pork Loin
I rubbed our 3lb loin with a full coating of Martha Stewart's All Purpose Meat Rub, then tossed it in the oven until the thermometer said 155 (Betty Crocker says 20 mins/lb, but I just used a thermometer), then let it rest for 10 minutes. It was absolutely moist and flavorful. No knife needed.
All Purpose Spice Rub
From Martha Stewart
1/3 cup coarse salt
1/4 cup packed brown sugar
1/4 cup paprika
2 Tbsp black pepper
2 Tbsp oregano
2 Tbsp thyme
1 Tbsp cayenne pepper
Mix all ingredients and store in an airtight container.
Note: I gave this out for Christmas last year. Not sure if anyone used it(?) but I think it's tasty.

Butternut Squash, Chanterelle and Baby Pea Risotto
Strongly butchered from the Seattle Times
3 cups butternut squash, diced
salt and pepper
Pam
2 tsp thyme
1 onion, diced
2 Tbsp butter
1 cup arborio rice
4 cups chicken stock
1 cup chanterelles, chopped, frozen*
1 cup frozen peas, thawed
1 cup grated Parmesan
Heat oven to 400 degrees. Spray baking sheet with Pam. Toss squash with a spritz of Pam, thyme, and salt and pepper to taste. Roast for 20 minutes, or until soft, stirring after 10 minutes. Set aside.
Pour stock into pot and heat to simmer.
Heat skillet over medium heat; melt butter. Add onion and saute until soft, about 3-5 minutes. Add rice. Cook, stirring constantly, for 2-3 minutes. Add 1 cup stock. Cook until all liquid is absorbed. Add chanterelles. Continue adding stock, 1/2-1 cup at a time, cooking until liquid is absorbed. After addign 3 1/2 cups stock, taste the rice. It should still have some chew but be tender. If necessary, add the remaining stock. Add peas and cooked squash. Remove from heat and stir in Parmesan cheese.

Kale Chips
1 bunch kale
Pam
Seasoning Salt
Heat oven to 350 degrees. Rinse kale. Remove leaves from stems. Discard stems. Tear or chop into bite sized pieces. Dry thoroughly in salad spinner or with paper towels. Spray baking sheet with Pam and layer kale. Spray tops with Pam and sprinkle with seasoning salt (I used Johnny's - MSG is delicious). Bake 10-15 minutes, or until edges are crispy but not burnt. Let cool, if you can resist.
Monday, October 24, 2011
Don't Be Scared
Yesterday I made cupcakes.

Thrilling, I know. But these weren't just any cupcakes. These were filled cupcakes, and an experiment, to boot. I've never made filled cupcakes before, so I had to do a little research on the interwebs. I had though about filling them prior to cooking, but apparently that's not what typically happens. I found several different ways to fill them, including sticking the tip of a piping bag into a baked cupcake and forcing the stuffing in. I didn't think that sounded very appealing, so I went a different route.
I had made boxed yellow cake, which I know isn't very sophisticated, but there is just something about it I love. I knew I wanted to make chocolate frosting from a recipe my mom used to use, so I needed a filling that would work with the two. I decided on a jar of homemade blackberry jam from last year that had been slightly over-cooked and turned out really thick - thicker than honey, even. Instead of just using it as it, I mixed it in a pot with a couple tablespoons of water and heated it to boiling. I may have added too much water, but it worked pretty dang good.
To fill my cupcakes, I used a paring knife to cut out a cone shape from the center of the cupcake. To make space of the filling, cup off the tip of the cone. My jam was still warm when I put it in the cupcakes, so I probably could have skipped this step. Fill the hole with filling, and plop on the cut out piece. Frost as usual.
I tried to pipe my frosting because I didn't want cupcake crumbs to mess up the smooth top. Turns out I should have let it cool a bit longer, or used less water, because there was no evidence of the star tip I used once the frosting oozed together into a solid fudgy mass. Not that I'm complaining. It's still a delicious solid fudgy mass.
But it turns out that when you bite into my cupcakes, not knowing they are filled, and it being halloween and all, it looks like the cupcake is bleeding.

Now that I've filled cupcakes once I can't stop imagining the options. Lemon curd filled rainbow chip cakes with strawberry frosting? YUM.

Thrilling, I know. But these weren't just any cupcakes. These were filled cupcakes, and an experiment, to boot. I've never made filled cupcakes before, so I had to do a little research on the interwebs. I had though about filling them prior to cooking, but apparently that's not what typically happens. I found several different ways to fill them, including sticking the tip of a piping bag into a baked cupcake and forcing the stuffing in. I didn't think that sounded very appealing, so I went a different route.
I had made boxed yellow cake, which I know isn't very sophisticated, but there is just something about it I love. I knew I wanted to make chocolate frosting from a recipe my mom used to use, so I needed a filling that would work with the two. I decided on a jar of homemade blackberry jam from last year that had been slightly over-cooked and turned out really thick - thicker than honey, even. Instead of just using it as it, I mixed it in a pot with a couple tablespoons of water and heated it to boiling. I may have added too much water, but it worked pretty dang good.
To fill my cupcakes, I used a paring knife to cut out a cone shape from the center of the cupcake. To make space of the filling, cup off the tip of the cone. My jam was still warm when I put it in the cupcakes, so I probably could have skipped this step. Fill the hole with filling, and plop on the cut out piece. Frost as usual.
I tried to pipe my frosting because I didn't want cupcake crumbs to mess up the smooth top. Turns out I should have let it cool a bit longer, or used less water, because there was no evidence of the star tip I used once the frosting oozed together into a solid fudgy mass. Not that I'm complaining. It's still a delicious solid fudgy mass.
But it turns out that when you bite into my cupcakes, not knowing they are filled, and it being halloween and all, it looks like the cupcake is bleeding.

Now that I've filled cupcakes once I can't stop imagining the options. Lemon curd filled rainbow chip cakes with strawberry frosting? YUM.
Fast Fudge Frosting
From Mom's Recipe Box
Ingredients:
1 lb powdered sugar (~4 ¾ cups)
½ cup cocoa
¼ tsp salt
1/3 cup boiling water
1/3 cup butter or margarine, melted
1 tsp vanilla
Directions:
Combine sugar, cocoa and salt. Add water and butter, blend. Add vanilla.
Will frost tops and sides of two 8- or 9-inch layers. Leftovers, if you have any, will keep in the fridge indefinitely.
Thursday, October 13, 2011
Mushroom Bliss
Another successful mushroom hunt! My parents were in town a couple weeks ago and we took part in two of my favorite fall pastimes: football and chanterelle picking! The Huskies dominated Cal 31-23 on Saturday, then on Sunday we headed to the fungus fields. We hit the "secret spot" early in the morning so they could make it back home at a decent hour. After searching fruitlessly in one spot for 20 minutes, I decided someone else must have been there first and we moved on. Then we hit pay dirt. After finding their first "spore hole," both parents caught the bug and tromped around excitedly until our bags were full.

I made it home with about 8 lbs of chanterelles! I think Mom and Dad had about 6 lbs on top of that.
I knew we wouldn't be able to use that many before they got all mushy, so about 5 of my 8 lbs were frozen. I wanted to try drying them, but my coworker had mentioned that he had heard they don't reconstitute very well. Dad tried it though, so we'll have to wait for a report from him.
To freeze chanterelles, clean them by running under a steady stream of water until all loose dirt is off. Set on paper towels to dry for 5 minutes. Roughly chop while heating a saute pan over medium heat. Cook mushrooms over medium heat until they release a lot of water, and it evaporates. Add a small amount of butter and salt and cook for a few more minutes. Freeze in tupperware in individual portions so they are easy to grab at a moments notice.
I have been slowly adding the rest of my horde to meals. The best one yet was a full on cooking even we had two weeks ago.

Oven Roasted Chicken (from this post), bacon mashed potatoes, Parmesan chard, and pear and chanterelle stuffing. It. Was. GLORIOUS.
We really have that whole roast a chicken in less than an hour thing down pat. We went from this:

(Note the baguette and goat cheese brie appetizer. A must when you don't eat until 8:30pm.)
To this:

With barely even a thought. Yeah, we're good.
But the star of this meal was really the stuffing. We poached the recipe from the Times, but it made such a big batch, and used so much butter, that we had to halve it. Ten tablespoons butter? Yikes.
Doesn't mean we didn't use any butter though...

I'm pretty sure that's the second butter addition to those onions...
We used a basic fresh bread loaf, which was fresh and way too soft, so it got ripped up and toasted in the oven for about 20 minutes on 250F.

And can I just say how hard it is to gauge how much half a pound of chopped mushrooms is? I'm pretty good at estimating a lot of kitchen goods, but mushrooms are apparently not one of those things.

All I can say is that I hope I get the chance to go on a mushroom hunt again in November, because I don't want to pay $20/lb for chanterelles and this might just have to be the new Thanksgiving stuffing.
Chanterelle and Pear Bread Stuffing
Modified slightly from The New York Times
1 loaf french bread, cut or ripped into piece
1/2 lb chanterelle mushrooms
1/4 lb pancetta, diced
5 tablespoons butter
1/2 onion, chopped
1 minced shallot
Salt and pepper
2 pears, diced
1/2 tsp sugar
1 tablespoon chopped fresh thyme
1 cup chicken broth
1. Allow chopped bread to sit out overnight, covered with paper towels, or lightly toast in oven.
2. Clean mushrooms and chop. Set aside. Place pancetta in large skillet over medium heat. Cook slowly until fat is rendered, about 7 minutes. Remove to a large plate.
3. Ad 1 tablespoon butter to fat in pan and turn heat to medium high. Add onion and shallots, season with salt and pepper, and cook, stirring occasionally, until just soft. Remove to plate holding pancetta.
4. Add 1 1/2 tablespoon butter to pan. Add mushrooms, season with salt and pepper and quickly sate until starting to brown. Remove and add to plate.
5. Add remaining butter to pan. Add pears and sugar and season with salt and pepper. Sate pears over medium high heat until they begin to brown slightly.
6. In a large bowl, add sauteed ingredients to bread. Toss lightly to combine. Add herbs and toss again. Slowly pour broth over mixture and toss. Taste and adjust for salt and pepper.
7. Bake in 375 oven for 20-30 minutes, until a golden crust forms on bottom of pan.

I made it home with about 8 lbs of chanterelles! I think Mom and Dad had about 6 lbs on top of that.
I knew we wouldn't be able to use that many before they got all mushy, so about 5 of my 8 lbs were frozen. I wanted to try drying them, but my coworker had mentioned that he had heard they don't reconstitute very well. Dad tried it though, so we'll have to wait for a report from him.
To freeze chanterelles, clean them by running under a steady stream of water until all loose dirt is off. Set on paper towels to dry for 5 minutes. Roughly chop while heating a saute pan over medium heat. Cook mushrooms over medium heat until they release a lot of water, and it evaporates. Add a small amount of butter and salt and cook for a few more minutes. Freeze in tupperware in individual portions so they are easy to grab at a moments notice.
I have been slowly adding the rest of my horde to meals. The best one yet was a full on cooking even we had two weeks ago.

Oven Roasted Chicken (from this post), bacon mashed potatoes, Parmesan chard, and pear and chanterelle stuffing. It. Was. GLORIOUS.
We really have that whole roast a chicken in less than an hour thing down pat. We went from this:

(Note the baguette and goat cheese brie appetizer. A must when you don't eat until 8:30pm.)
To this:

With barely even a thought. Yeah, we're good.
But the star of this meal was really the stuffing. We poached the recipe from the Times, but it made such a big batch, and used so much butter, that we had to halve it. Ten tablespoons butter? Yikes.
Doesn't mean we didn't use any butter though...

I'm pretty sure that's the second butter addition to those onions...
We used a basic fresh bread loaf, which was fresh and way too soft, so it got ripped up and toasted in the oven for about 20 minutes on 250F.

And can I just say how hard it is to gauge how much half a pound of chopped mushrooms is? I'm pretty good at estimating a lot of kitchen goods, but mushrooms are apparently not one of those things.

All I can say is that I hope I get the chance to go on a mushroom hunt again in November, because I don't want to pay $20/lb for chanterelles and this might just have to be the new Thanksgiving stuffing.
Chanterelle and Pear Bread Stuffing
Modified slightly from The New York Times
1 loaf french bread, cut or ripped into piece
1/2 lb chanterelle mushrooms
1/4 lb pancetta, diced
5 tablespoons butter
1/2 onion, chopped
1 minced shallot
Salt and pepper
2 pears, diced
1/2 tsp sugar
1 tablespoon chopped fresh thyme
1 cup chicken broth
1. Allow chopped bread to sit out overnight, covered with paper towels, or lightly toast in oven.
2. Clean mushrooms and chop. Set aside. Place pancetta in large skillet over medium heat. Cook slowly until fat is rendered, about 7 minutes. Remove to a large plate.
3. Ad 1 tablespoon butter to fat in pan and turn heat to medium high. Add onion and shallots, season with salt and pepper, and cook, stirring occasionally, until just soft. Remove to plate holding pancetta.
4. Add 1 1/2 tablespoon butter to pan. Add mushrooms, season with salt and pepper and quickly sate until starting to brown. Remove and add to plate.
5. Add remaining butter to pan. Add pears and sugar and season with salt and pepper. Sate pears over medium high heat until they begin to brown slightly.
6. In a large bowl, add sauteed ingredients to bread. Toss lightly to combine. Add herbs and toss again. Slowly pour broth over mixture and toss. Taste and adjust for salt and pepper.
7. Bake in 375 oven for 20-30 minutes, until a golden crust forms on bottom of pan.
Wednesday, August 17, 2011
Millions of Peaches
Gotta eat me a lot of peaches.

A 24 lb box of peaches appeared in my house last week. I don't know if you can conceptualize how many peaches that is. It's A LOT. Enough that I have eaten a peach a day since them, and still had some to make Peach Crisp for the girls last week, two loaves of Peach Bread for eating and freezing, to give away two bags to friends, throw three out due to mold, bring a bowl-full to work, and still have about 12 of them in my fridge. It's insanity.

Oh the joys of EWa produce. Only $10 for the box.
Last night decided I wanted to store 5 in the fridge for eating and get rid of the rest. They're on their way to being over ripe and need to be eaten or processed YESTERDAY. The easiest way to save them for later is, of course, to freeze them. But I already have a bag of frozen peaches, so the next best thing is..... ICE CREAM!!!

I picked the the five ripest in the bin and found a recipe I could butcher to my liking. It had to be super peachy, and it had to technically be a sorbet - no dairy allowed in this "creamy" concoction. Here's what I came up with:
Peach Sorbet
Butchered by Robyn
5 ripe peaches
3/4 cup water
1/2 cup sugar
1 Tbsp lemon juice
2 Tbsp Frangelico (or other booze - but no kirsh, I HATE kirsh)
Remove pits from peaches and dice, do not remove skin. Heath peaches and water over medium heat for 10 minutes, or until peaches are cooked. Stir in sugar. Use blender, food processor, or immersion blender to puree peaches. Add lemon juice and booze. Refrigerate until cool. Process in ice cream maker following manufacturer's directions. Try not to eat it all before freezing for 3 hours.

I ate mine over a brownie, fresh out of the oven. The hot brownie melted the soft peach sorbet and made magic in my mouth. I plan on repeating the experience tonight with fully hardened ice cream. The tiny taste I had this morning was very telling - this sorbet has retained its creamy texture and is not grainy at all after a full 8 hours of freezing. Success!

A 24 lb box of peaches appeared in my house last week. I don't know if you can conceptualize how many peaches that is. It's A LOT. Enough that I have eaten a peach a day since them, and still had some to make Peach Crisp for the girls last week, two loaves of Peach Bread for eating and freezing, to give away two bags to friends, throw three out due to mold, bring a bowl-full to work, and still have about 12 of them in my fridge. It's insanity.

Oh the joys of EWa produce. Only $10 for the box.
Last night decided I wanted to store 5 in the fridge for eating and get rid of the rest. They're on their way to being over ripe and need to be eaten or processed YESTERDAY. The easiest way to save them for later is, of course, to freeze them. But I already have a bag of frozen peaches, so the next best thing is..... ICE CREAM!!!

I picked the the five ripest in the bin and found a recipe I could butcher to my liking. It had to be super peachy, and it had to technically be a sorbet - no dairy allowed in this "creamy" concoction. Here's what I came up with:
Peach Sorbet
Butchered by Robyn
5 ripe peaches
3/4 cup water
1/2 cup sugar
1 Tbsp lemon juice
2 Tbsp Frangelico (or other booze - but no kirsh, I HATE kirsh)
Remove pits from peaches and dice, do not remove skin. Heath peaches and water over medium heat for 10 minutes, or until peaches are cooked. Stir in sugar. Use blender, food processor, or immersion blender to puree peaches. Add lemon juice and booze. Refrigerate until cool. Process in ice cream maker following manufacturer's directions. Try not to eat it all before freezing for 3 hours.

I ate mine over a brownie, fresh out of the oven. The hot brownie melted the soft peach sorbet and made magic in my mouth. I plan on repeating the experience tonight with fully hardened ice cream. The tiny taste I had this morning was very telling - this sorbet has retained its creamy texture and is not grainy at all after a full 8 hours of freezing. Success!
Tuesday, August 2, 2011
Summer Growth Spurt
This weekend felt like summer and I have the sunburn to prove it. I spent Saturday at Bowman Bay for my company picnic and apparently forgot to reapply sunscreen on a few choice areas, namely my chest and the right side of my left ankle. How that one happened is anyone's guess.
In my burn-induced house arrest on Sunday (ha! the world conspires against me in puns) I spent most of the day sitting on the couch, either reading, knitting, or watching Anthony Bourdain. And, of course, it was the latter that got me out of the house.
Tony was in Naples, and at the end of the show he had dinner at someone's mother's house. She made a "simple" Sunday dinner of pasta in meat sauce that made me drool. Once the craving took hold, there was no changing what was on our dinner menu for the evening. We winged it, but the result was really fabulous.

"Homemade" Ragu
1 onion, diced
1/2 lb mushrooms, sliced
4 cloves garlic, minced
2 Italian sausages, casings removed
1 lb flank steak, sliced 1 inch thick
2 lbs beef roast, any cut, cubed
1/2 -1 cup of good red wine (to taste)
2 (15 oz) cans tomato sauce
2 (15 oz) cans diced tomatoes
2 Tbsp thyme
2 Tbsp oregano
2 Tbsp basil
2 tsp parsley
1/2 tsp red pepper flakes
Heat large sauce pan (I used a 7 quart dutch oven) over medium-high heat. Add just enough oil to cover the bottom of the pan. Brown mean in small portions, makign sure to never cover the entire bottom of pan. Remove meat once browned and set aside. Add onions to drippings in pan, adding more oil if necessary. Cook until onions are brown, then add mushrooms and garlic. Once mushrooms have "sweated" add wine to deglaze the pan. After wine starts to reduce, return meat to pan and add remaining ingredients. Reduce heat and simmer for at least 2 hours, more if you can wait. The longer it simmers, the better it will be.
To serve, remove meat from sauce. Ladle sauce over your favorite pasta (penne or rigatoni work great for this) and serve meat as a side. Leftovers are even better than the first time around!
While the sauce was a-simmering, I went for a walk around the garden and was impressed at what the recent heat has done for my plants.
My peas have only a few pods left on them and will soon be pulled to make way for something else. Romaine maybe?

I have a handful of small green tomatoes. It's supposed to hit 80 this week, so maybe I'll get a few more to pop out, and a little growth on these guys.

Most impressive, I think, are my cucumbers. I have two plants, and they both have several inch - inch and a half long baby cucumbers. And one even has a monster 3 incher!

My zucchini and bottleneck squash are toddling along slowly. They have perked up quite a bit and have some new growth, but nothing impressive. A couple of blossoms and the leaves have gotten a bit bigger than they used to be, but no fruit yet. The zucchini transplanted from a friend's yard has recovered from the move and seems to be thriving. It dropped a leaf or two, but there are some new ones growing and a few blossoms about to pop. These leaves put mine to shame! We'll have to wait and see which one produces before judging them too harshly.

Living right next to this guy are my two tomatoes I started from seed. They're both looking healthy, but I fear they'll be too small to produce anything this season. But I'm going to remember that this actually worked and try again next year. A single dollar for a packet of seeds vs $5 for a start - what savings!

What I've found most disappointing so far, aside from my radishes and carrots that haven't done SQUAT, are my beans. I think I have a combination of bad soil (maybe an excuse for the radishes), late planting, and squirrels. I think those fluffy buggers have found my seeds after I planted them, dug them up and ate them. That or I got a bad packet of pole beans. I planted both bush and pole, and I think maybe 2 out of 35 of the poles have sprouted vs almost all of the bushes. I've heard that you can keep planting bush beans up until August, but the ones I have in the ground now are all pretty dang small.

The first batch planted, back in early June. Seeds were soaked for 24 hours before planting.

The second batch, planted in late June/early July. Seeds were soaked, and organic fertilizer was used in the hole before planting.

The last batch of bush beans, planted in mid July. Some beans were soaked, some were not. All were planted with some osmocote fertilizer. Soaked beans are slightly larger than non-soaked beans.
They haven't quite caught up with the second batch, but have already surpassed the first. I haven't decided if it's a sun or a water thing, or the different fertilizer. I decided to try Osmocote because cats love the organic stuff (proven by Ollie breaking into the storage closet on several occasions) and I didn't want to encourage the neighborhood felines to hang out in my yard or dig up my plants. The squirrels do enough of that. If only we could get the cats to actually scare the squirrels away...
I'm anxious to produce something I can eat other than peas. I keep walking through the local P-Patch and getting really jealous of the amazing produce. It's something to aspire to. I think I'll do serious planning this fall and winter, peruse the local seed manufacturers catalogs, and do some soil improvements and maybe next year I can bump up the yield to P-Patch levels.
In my burn-induced house arrest on Sunday (ha! the world conspires against me in puns) I spent most of the day sitting on the couch, either reading, knitting, or watching Anthony Bourdain. And, of course, it was the latter that got me out of the house.
Tony was in Naples, and at the end of the show he had dinner at someone's mother's house. She made a "simple" Sunday dinner of pasta in meat sauce that made me drool. Once the craving took hold, there was no changing what was on our dinner menu for the evening. We winged it, but the result was really fabulous.

"Homemade" Ragu
1 onion, diced
1/2 lb mushrooms, sliced
4 cloves garlic, minced
2 Italian sausages, casings removed
1 lb flank steak, sliced 1 inch thick
2 lbs beef roast, any cut, cubed
1/2 -1 cup of good red wine (to taste)
2 (15 oz) cans tomato sauce
2 (15 oz) cans diced tomatoes
2 Tbsp thyme
2 Tbsp oregano
2 Tbsp basil
2 tsp parsley
1/2 tsp red pepper flakes
Heat large sauce pan (I used a 7 quart dutch oven) over medium-high heat. Add just enough oil to cover the bottom of the pan. Brown mean in small portions, makign sure to never cover the entire bottom of pan. Remove meat once browned and set aside. Add onions to drippings in pan, adding more oil if necessary. Cook until onions are brown, then add mushrooms and garlic. Once mushrooms have "sweated" add wine to deglaze the pan. After wine starts to reduce, return meat to pan and add remaining ingredients. Reduce heat and simmer for at least 2 hours, more if you can wait. The longer it simmers, the better it will be.
To serve, remove meat from sauce. Ladle sauce over your favorite pasta (penne or rigatoni work great for this) and serve meat as a side. Leftovers are even better than the first time around!
While the sauce was a-simmering, I went for a walk around the garden and was impressed at what the recent heat has done for my plants.
My peas have only a few pods left on them and will soon be pulled to make way for something else. Romaine maybe?

I have a handful of small green tomatoes. It's supposed to hit 80 this week, so maybe I'll get a few more to pop out, and a little growth on these guys.

Most impressive, I think, are my cucumbers. I have two plants, and they both have several inch - inch and a half long baby cucumbers. And one even has a monster 3 incher!

My zucchini and bottleneck squash are toddling along slowly. They have perked up quite a bit and have some new growth, but nothing impressive. A couple of blossoms and the leaves have gotten a bit bigger than they used to be, but no fruit yet. The zucchini transplanted from a friend's yard has recovered from the move and seems to be thriving. It dropped a leaf or two, but there are some new ones growing and a few blossoms about to pop. These leaves put mine to shame! We'll have to wait and see which one produces before judging them too harshly.

Living right next to this guy are my two tomatoes I started from seed. They're both looking healthy, but I fear they'll be too small to produce anything this season. But I'm going to remember that this actually worked and try again next year. A single dollar for a packet of seeds vs $5 for a start - what savings!
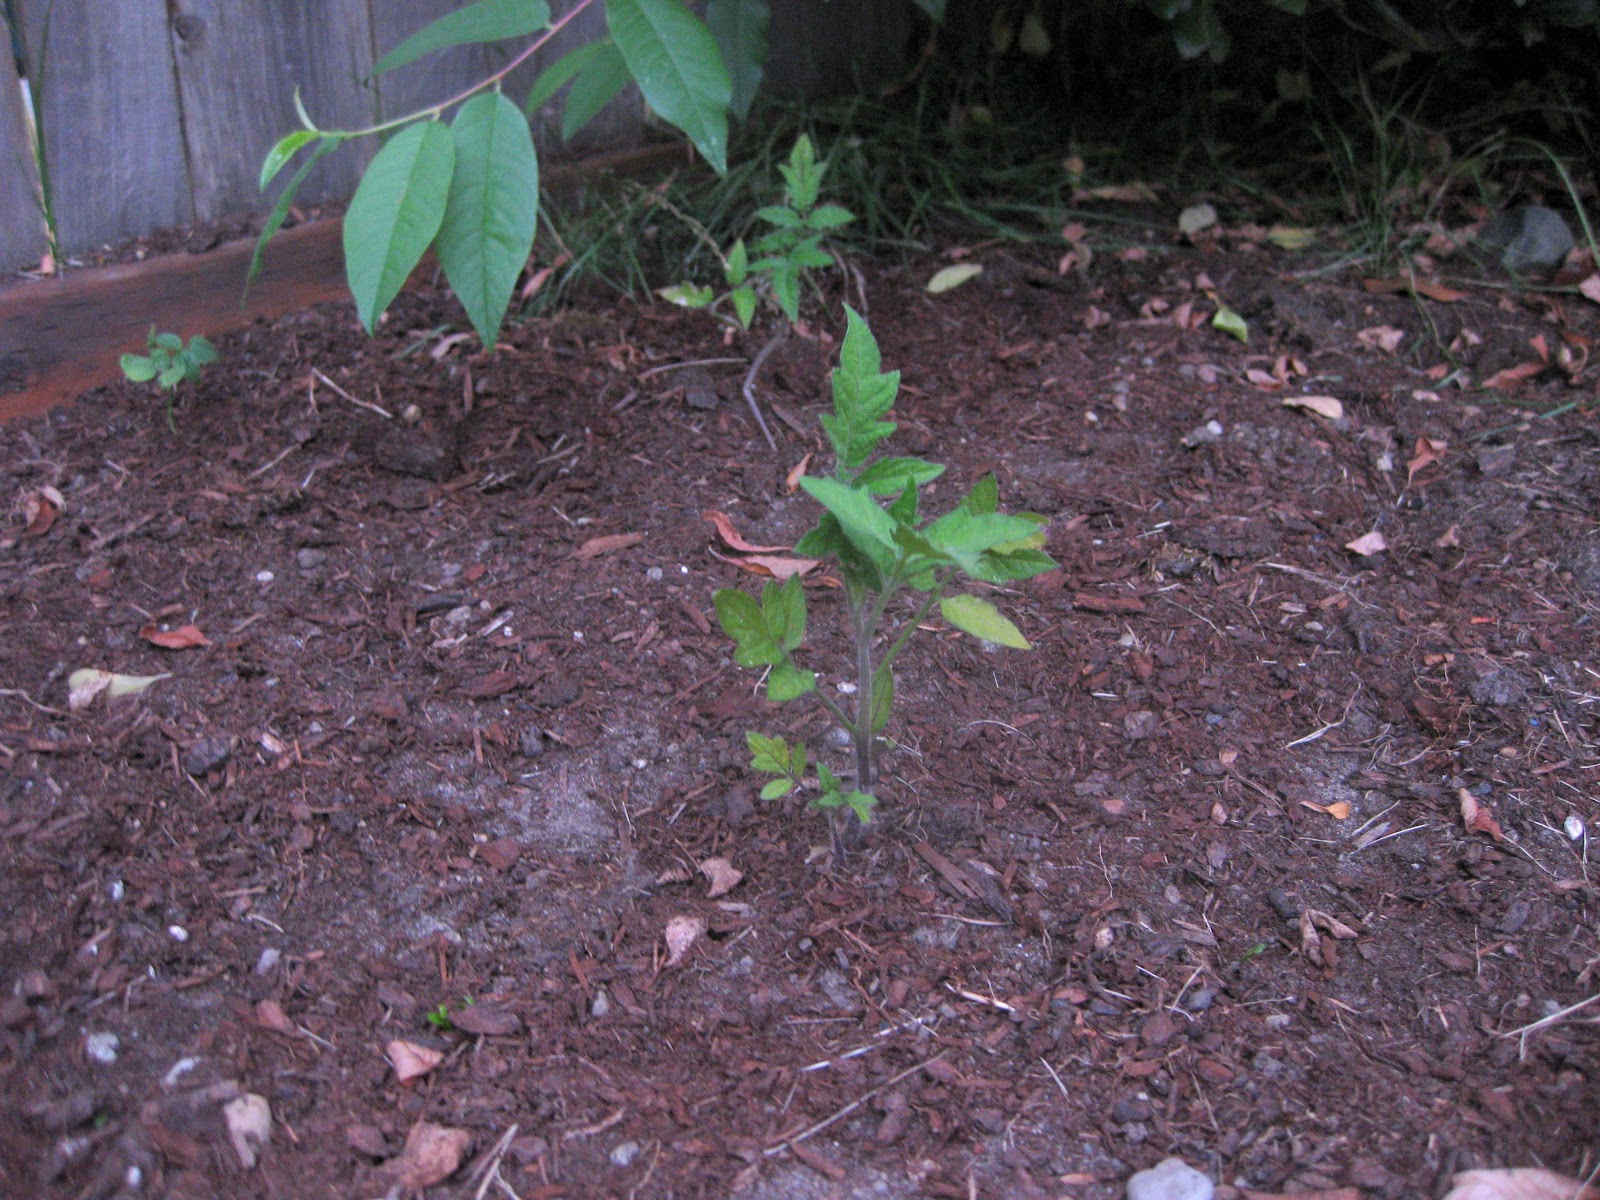
What I've found most disappointing so far, aside from my radishes and carrots that haven't done SQUAT, are my beans. I think I have a combination of bad soil (maybe an excuse for the radishes), late planting, and squirrels. I think those fluffy buggers have found my seeds after I planted them, dug them up and ate them. That or I got a bad packet of pole beans. I planted both bush and pole, and I think maybe 2 out of 35 of the poles have sprouted vs almost all of the bushes. I've heard that you can keep planting bush beans up until August, but the ones I have in the ground now are all pretty dang small.

The first batch planted, back in early June. Seeds were soaked for 24 hours before planting.

The second batch, planted in late June/early July. Seeds were soaked, and organic fertilizer was used in the hole before planting.

The last batch of bush beans, planted in mid July. Some beans were soaked, some were not. All were planted with some osmocote fertilizer. Soaked beans are slightly larger than non-soaked beans.
They haven't quite caught up with the second batch, but have already surpassed the first. I haven't decided if it's a sun or a water thing, or the different fertilizer. I decided to try Osmocote because cats love the organic stuff (proven by Ollie breaking into the storage closet on several occasions) and I didn't want to encourage the neighborhood felines to hang out in my yard or dig up my plants. The squirrels do enough of that. If only we could get the cats to actually scare the squirrels away...
I'm anxious to produce something I can eat other than peas. I keep walking through the local P-Patch and getting really jealous of the amazing produce. It's something to aspire to. I think I'll do serious planning this fall and winter, peruse the local seed manufacturers catalogs, and do some soil improvements and maybe next year I can bump up the yield to P-Patch levels.
Thursday, May 26, 2011
Childhood favorite
Growing up Mom had three canisters sitting on the counter when you first walked into the kitchen. One had flour, one had sugar, and the other held cookies. I remember some chocolate or strawberry wafers thrown in for variety, but almost always it was filled with Oreos. I have probably eaten my weight in Oreos. Twice.
...Maybe three times if you count the chocolate covered mint ones we got special at Christmastime. At least it got me to drink milk??

A couples days ago, SmittenKitchen posted a recipe for Rhubarb Streusel Muffins. I salivated over them as I read the recipe and reminded my boyfriend, yet again, that he is supposed to bring me rhubarb from his garden so I could bake something to take camping over Memorial Day Weekend. But I got distracted by the link to the recipe four years ago: Homemade Oreos. So, with full knowledge that there was no way one batch would last from Monday night until the weekend, I made them anyway.
I fully intended to take pictures, but I forgot. It was late at night anyway and pictures would have been crappy. Then half of them were gone by morning. Oops.
So, for the sake of this blog post, I made another batch last night! And if you believe that, I've got a bridge to sell you...
Homemade Oreos
Accidentally modified from Smitten Kitchen
Chocolate wafers:
1 1/4 cup flour
1/2 cup cocoa
1 tsp baking soda
1/4 tsp baking powder
1/4 tsp salt
1 1/4 cup sugar (or 1 cup plus whatever accidentally fell in from the sugar pot)
1/2 cup plus 2 tablespoons butter, room temperature
1 egg
Cream filling:
1/4 cup unsalted butter, room temperature
1/4 cup shortening, room temperature
2 cups powdered sugar
2 tsp vanilla
To make the wafers, preheat oven to 375. Mix all dry ingredients, including sugar, which is technically a wet ingredient. Add butter and egg and mix like crazy. When you start mixing it will get kind of clumpy and look like this:

But if you keep mixing.... and keep mixing.... and keep mixing, it will eventually turn into a crumbly dough:

Spoon rounded teaspoons of dough onto a baking sheet lined with parchment paper. Press mounds flat with the bottom of a glass or measuring cup. Bake for 9 minutes (Quicker and easier to bake two cookie sheets at once on middle two oven racks - just switch racks halfway through baking to make sure they're even). Place on rack to cool.
To make the filling, cream butter and shortening. Add powdered sugar in 1/2 cup increments, mixing well between additions. Add 1 tsp of vanilla after you reach 1 cup and 2 cups. Continue to beat filling for several minutes to make it light and fluffy.
To make sandwiches, fill a small plastic baggie with cream filling. Cut off the tip of the baggie to squeeze out filling. Pipe desired amount of cream on wafer and top with wafer of the same size. I piped a little over a teaspoon onto each cookie and had plenty of filling left over - from both batches of oreos!

Take note, this filling is delightful slathered on a graham cracker. Having extra is not a bad thing! Or instead of vanilla, you can add peppermint extract to the cream filling and have special holiday oreos! YES!
In other life news, I took some pictures of the yard I'll be moving to shortly. Not great pictures, but at least they give an idea of what I'll be working with. New raised beds may be in my future...

...Maybe three times if you count the chocolate covered mint ones we got special at Christmastime. At least it got me to drink milk??

A couples days ago, SmittenKitchen posted a recipe for Rhubarb Streusel Muffins. I salivated over them as I read the recipe and reminded my boyfriend, yet again, that he is supposed to bring me rhubarb from his garden so I could bake something to take camping over Memorial Day Weekend. But I got distracted by the link to the recipe four years ago: Homemade Oreos. So, with full knowledge that there was no way one batch would last from Monday night until the weekend, I made them anyway.
I fully intended to take pictures, but I forgot. It was late at night anyway and pictures would have been crappy. Then half of them were gone by morning. Oops.
So, for the sake of this blog post, I made another batch last night! And if you believe that, I've got a bridge to sell you...
Homemade Oreos
Accidentally modified from Smitten Kitchen
Chocolate wafers:
1 1/4 cup flour
1/2 cup cocoa
1 tsp baking soda
1/4 tsp baking powder
1/4 tsp salt
1 1/4 cup sugar (or 1 cup plus whatever accidentally fell in from the sugar pot)
1/2 cup plus 2 tablespoons butter, room temperature
1 egg
Cream filling:
1/4 cup unsalted butter, room temperature
1/4 cup shortening, room temperature
2 cups powdered sugar
2 tsp vanilla
To make the wafers, preheat oven to 375. Mix all dry ingredients, including sugar, which is technically a wet ingredient. Add butter and egg and mix like crazy. When you start mixing it will get kind of clumpy and look like this:

But if you keep mixing.... and keep mixing.... and keep mixing, it will eventually turn into a crumbly dough:

Spoon rounded teaspoons of dough onto a baking sheet lined with parchment paper. Press mounds flat with the bottom of a glass or measuring cup. Bake for 9 minutes (Quicker and easier to bake two cookie sheets at once on middle two oven racks - just switch racks halfway through baking to make sure they're even). Place on rack to cool.
To make the filling, cream butter and shortening. Add powdered sugar in 1/2 cup increments, mixing well between additions. Add 1 tsp of vanilla after you reach 1 cup and 2 cups. Continue to beat filling for several minutes to make it light and fluffy.
To make sandwiches, fill a small plastic baggie with cream filling. Cut off the tip of the baggie to squeeze out filling. Pipe desired amount of cream on wafer and top with wafer of the same size. I piped a little over a teaspoon onto each cookie and had plenty of filling left over - from both batches of oreos!

Take note, this filling is delightful slathered on a graham cracker. Having extra is not a bad thing! Or instead of vanilla, you can add peppermint extract to the cream filling and have special holiday oreos! YES!
In other life news, I took some pictures of the yard I'll be moving to shortly. Not great pictures, but at least they give an idea of what I'll be working with. New raised beds may be in my future...

Monday, March 21, 2011
Cinnamon, sickness, and a present
Last weekend I made cinnamon rolls that were above and beyond delicious. They even rival my grandma's cinnamon rolls, and that's saying something.

The bread was moist and tender, even after several days. The ratio of cinnamon goo to bread was great. The frosting was light and prevalent. In other words, I would eat these every day for breakfast if my waistline could manage it.
They are, of course, one of Alton Brown's amazing creations. The recipe can be found here.
I made them last Saturday night/Sunday morning. I wanted to eat all of them, but one was enough to tide me over until Monday. Unfortunately, I couldn't breathe on Monday, so my second roll had to wait a while to be eaten.
I got hit with a serious head cold and was completely out of it for most of the week. I still went to work, but most of the days were spent drinking cranberry juice cut with water and blowing my nose. Saturday the sinus pressure had built up so badly that I felt like I had been kicked in the head. I had to do something drastic. Then I discovered the joys of a netipot. Sinus pressure has since reduced from a constant pain to a dull throb that is usually minimized right after I blow my nose. I'm at day 8 and still not up to 100%. I highly suggest avoiding this cold.

During the multiple hours I spent miserable on my couch last week I finished a present! I made fingerless mitts for my dear brother for his birthday. I tagged the pattern when I found it in a library book to be used at a later date. I so rarely knit for men, for many reasons, just a few of them being: there are fewer men in my life than women, there are few patterns fit for the manly man, and a guy can only use so many hats!
When I first read this pattern, I guffawed when I saw it was knit flat and stitched. I think it's silly to knit something flat when it is perfectly easy to knit in the round, and less work, to boot. But alas, I thought I should follow the pattern, and I went against my best judgment and knit according to the pattern. What a pain in the caboose. I like the mitts and might knit them again if someone wants a pair, but I will NEVER again knit them flat.

Pattern: Bird's Eye Mitts, by Martin Storey
Yarn: Paton's Classic Wool, Black, Green Heather
Needles: US Size 2, US Size 5
New Cold Sheep Totals:
Yards left = 16,348.3
Grams left = 10,351.2
Skeins left = 120.5
FO = 5

The bread was moist and tender, even after several days. The ratio of cinnamon goo to bread was great. The frosting was light and prevalent. In other words, I would eat these every day for breakfast if my waistline could manage it.
They are, of course, one of Alton Brown's amazing creations. The recipe can be found here.
I made them last Saturday night/Sunday morning. I wanted to eat all of them, but one was enough to tide me over until Monday. Unfortunately, I couldn't breathe on Monday, so my second roll had to wait a while to be eaten.
I got hit with a serious head cold and was completely out of it for most of the week. I still went to work, but most of the days were spent drinking cranberry juice cut with water and blowing my nose. Saturday the sinus pressure had built up so badly that I felt like I had been kicked in the head. I had to do something drastic. Then I discovered the joys of a netipot. Sinus pressure has since reduced from a constant pain to a dull throb that is usually minimized right after I blow my nose. I'm at day 8 and still not up to 100%. I highly suggest avoiding this cold.

During the multiple hours I spent miserable on my couch last week I finished a present! I made fingerless mitts for my dear brother for his birthday. I tagged the pattern when I found it in a library book to be used at a later date. I so rarely knit for men, for many reasons, just a few of them being: there are fewer men in my life than women, there are few patterns fit for the manly man, and a guy can only use so many hats!
When I first read this pattern, I guffawed when I saw it was knit flat and stitched. I think it's silly to knit something flat when it is perfectly easy to knit in the round, and less work, to boot. But alas, I thought I should follow the pattern, and I went against my best judgment and knit according to the pattern. What a pain in the caboose. I like the mitts and might knit them again if someone wants a pair, but I will NEVER again knit them flat.

Pattern: Bird's Eye Mitts, by Martin Storey
Yarn: Paton's Classic Wool, Black, Green Heather
Needles: US Size 2, US Size 5
New Cold Sheep Totals:
Yards left = 16,348.3
Grams left = 10,351.2
Skeins left = 120.5
FO = 5
Friday, January 28, 2011
Naan for you
There has been a suspicious lack of knitting lately. I'm blaming work for taking up my time and making me drive all over the state. But I have finished the Ruffles scarf and even wore it yesterday. It's amazingly soft next to the skin and is perfect for the not-so-cold days we've been having. No pictures yet, but soon. I promise.
Instead I wanted to share the recipe for naan I use because it is both delightfully easy and delicious. And I'm chewing on some right now and it sounded like the right thing to do.
 It's a bit time consuming, as breads are, due to the rise time. But it's weeknight friendly because it only rises for an hour and a half and you can still eat dinner around 7ish if you start it right when you get home.
 My original recipe said to cook them on the grill, and I'm sure you can, but I'm always looking for things I can cook on my electric griddle, and these babies are perfect. You roll them out as flat as you can, then toss them on the hot pan. They puff up as they cook and start to look a bit like pancakes.

And who doesn't like pancakes?
I made plain naan this time, but I usually throw in some garlic when I'm rolling the dough into balls. I'm thinking some compound garlic butter rubbed on them as their cooking would be good, too. Or just allowing diced garlic to sit in melted butter for half an hour before using. I'd suggest using garlic salt, but that's just crazy talk induced by my obsession with the stuff.

I ate my naan last night (and leftovers for lunch - still delish) with chicken and vegetable tikka masala. I coped out here a bit by using a jar of sauce I got at Cost Plus World Market. I added a bit of tomato paste, greek yogurt, and some spices to zip it up a bit and the naan was great to mop up extra sauce.
Naan
2 1/4 teaspoons active dry yeast (1 package)
1 cup very warm, but not hot, water
1/4 cup white sugar, divided
3 Tablespoons milk (or yogurt)
1 egg, beaten
2 teaspoons salt
4 1/4 cup all purpose flour
minced garlic (optional)
2 Tablespoons butter, melted
Add yeast to warm water and allow to "poof." Add 1 Tablespoon of the sugar and allow to proof for 5 minutes. Add remaining sugar, milk, egg and salt. Add flour, 1/2 cup at a time, until a soft dough forms. You may only need 4 cups. Knead dough for 6 to 8 minutes until smooth.
Place dough in oiled bowl and cover with damp towel. Allow to rise in warm place for 1 hour, or until doubled in volume.
Punch down dough. Knead in garlic, if desired. Roll dough into small balls, approximately golf ball sized, or according to desired size of cooked naan. Cover with damp towel and allow to rise for approximately 30 minutes.
Heat griddle to 350 degrees. Stretch or roll out dough very thin and place on griddle (thin is subjective, but I like mine very thin because they puff up while cooking). Brush uncooked side with melted butter. When cooked side is golden brown, flip and cook. Brush other side with melted butter, if desired. Remove when both sides are golden brown.
Keeps well in the fridge in ball stage for up to 4 days.
Enjoy!
Instead I wanted to share the recipe for naan I use because it is both delightfully easy and delicious. And I'm chewing on some right now and it sounded like the right thing to do.


And who doesn't like pancakes?
I made plain naan this time, but I usually throw in some garlic when I'm rolling the dough into balls. I'm thinking some compound garlic butter rubbed on them as their cooking would be good, too. Or just allowing diced garlic to sit in melted butter for half an hour before using. I'd suggest using garlic salt, but that's just crazy talk induced by my obsession with the stuff.

I ate my naan last night (and leftovers for lunch - still delish) with chicken and vegetable tikka masala. I coped out here a bit by using a jar of sauce I got at Cost Plus World Market. I added a bit of tomato paste, greek yogurt, and some spices to zip it up a bit and the naan was great to mop up extra sauce.
Naan
2 1/4 teaspoons active dry yeast (1 package)
1 cup very warm, but not hot, water
1/4 cup white sugar, divided
3 Tablespoons milk (or yogurt)
1 egg, beaten
2 teaspoons salt
4 1/4 cup all purpose flour
minced garlic (optional)
2 Tablespoons butter, melted
Add yeast to warm water and allow to "poof." Add 1 Tablespoon of the sugar and allow to proof for 5 minutes. Add remaining sugar, milk, egg and salt. Add flour, 1/2 cup at a time, until a soft dough forms. You may only need 4 cups. Knead dough for 6 to 8 minutes until smooth.
Place dough in oiled bowl and cover with damp towel. Allow to rise in warm place for 1 hour, or until doubled in volume.
Punch down dough. Knead in garlic, if desired. Roll dough into small balls, approximately golf ball sized, or according to desired size of cooked naan. Cover with damp towel and allow to rise for approximately 30 minutes.
Heat griddle to 350 degrees. Stretch or roll out dough very thin and place on griddle (thin is subjective, but I like mine very thin because they puff up while cooking). Brush uncooked side with melted butter. When cooked side is golden brown, flip and cook. Brush other side with melted butter, if desired. Remove when both sides are golden brown.
Keeps well in the fridge in ball stage for up to 4 days.
Enjoy!
Monday, December 27, 2010
Homemade Christmas
Another homemade gift I made this Christmas was a Spice Rub set. I have been making a Taco Seasoning mix for a couple years now and like it a lot better than all the packaged brands. The other two mixes I made I haven't tried yet - a Cajun Seasoning and an All-Purpose Spice Rub. Online comments were very complimentary for both and I can't wait to try them with the bit of the mixes I have left at home.

Taco Seasoning
All Purpose Spice Rub
From Martha Stewart

Taco Seasoning
Ingredients:
2 tablespoon chili powder
½ teaspoon garlic powder
½ teaspoon onion powder
½ teaspoon crushed red pepper
½ teaspoon oregano
1 teaspoon paprika
3 teaspoon cumin
2 teaspoon sea salt
2 teaspoon black pepper
Directions:
1. Combine all ingredients and store in air-tight container. Store in a cool, dark and dry place for up to six months.
All Purpose Spice Rub
From Martha Stewart
Ingredients:
1/3 cup coarse salt
¼ cup packed light-brown sugar
¼ cup paprika
2 tablespoons ground black pepper
2 tablespoons dried oregano
2 tablespoons dried thyme leaves
1 tablespoon cayenne pepper
Directions:
1. In a small bowl, combine all the ingredients, using your hands to break up the sugar. Store in an airtight container, away from heat and light, up to 6 months.
Cajun Seasoning
From Tasty Kitchen
Ingredients:
2 cups Sea salt, ground finely
4 tablespoons cayenne pepper
3 tablespoons black pepper
2 tablespoons garlic powder
2 tablespoons parsley flakes
2 tablespoons chili powder
1 tsp onion powder
1 tsp nutmeg
Directions:
1. Combine all ingredients and store in air-tight container. Store in a cool, dark and dry place for up to six months.
Note: This is more a "seasoned salt" than a "seasoning mix."
To make this into a set for Christmas, I started saving small jars. Some were from pesto or dips, others from crushed garlic or jam. They were the perfect size, and once given a personalized label, made a great threesome to give as a gift.
To make this into a set for Christmas, I started saving small jars. Some were from pesto or dips, others from crushed garlic or jam. They were the perfect size, and once given a personalized label, made a great threesome to give as a gift.
Subscribe to:
Posts (Atom)